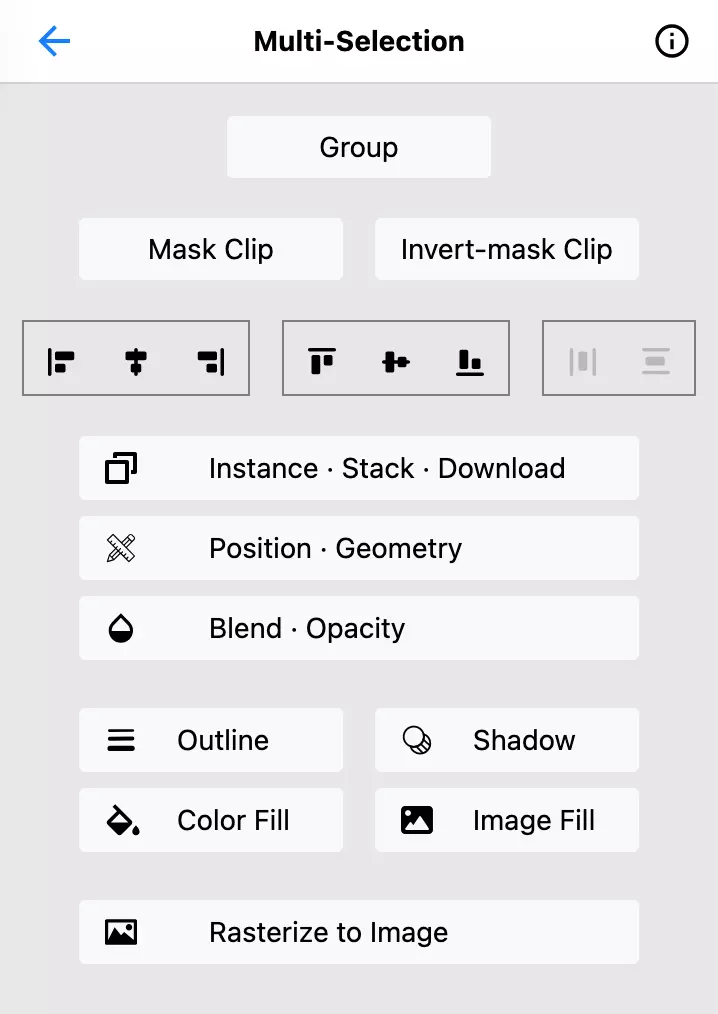
Group Actions
When you choose to select multiple objects on the canvas, a range of context actions tailored specifically for multi-selection becomes available. These comprehensive options empower you to perform various operations, such as creating groups to organize and manage related objects more efficiently. Additionally, you can create clippings to precisely control the visibility of selected elements. Moreover, the alignment feature ensures that your multiple objects are perfectly arranged according to your preferences. For streamlined editing, you can conveniently update the outline, fill, and other attributes collectively in a single operation. These diverse capabilities greatly enhance your ability to manipulate and modify multiple objects simultaneously, offering an enhanced and seamless editing experience on the canvas.
Grouping
After selecting multiple objects on the canvas, click on the button to group these objects into a new object. This action not only visually organizes your design but also enables you to manipulate the grouped objects collectively. Once grouped, you can move, resize, rotate, or apply transformations to the entire group as a single entity, saving you time and effort. Additionally, grouping provides a convenient way to apply shared attributes, such as styles, effects, or formatting, to all the objects within the group simultaneously.
Clipping
To create object clipping, follow these steps. Firstly, position a mask object on top of the object you wish to clip. This mask object serves as the defining shape that determines the visibility of the underlying object. The mask can be of any object type --- shape, (cutout) image, text, or object group. Secondly, with both the mask object and the object to be clipped selected, you are ready to proceed. Finally, simply click on the button or the button, depending on the desired effect you want to achieve. These actions enable you to apply clipping to your design, giving you complete control over which areas of the underlying object are revealed or concealed based on the shape of the mask.
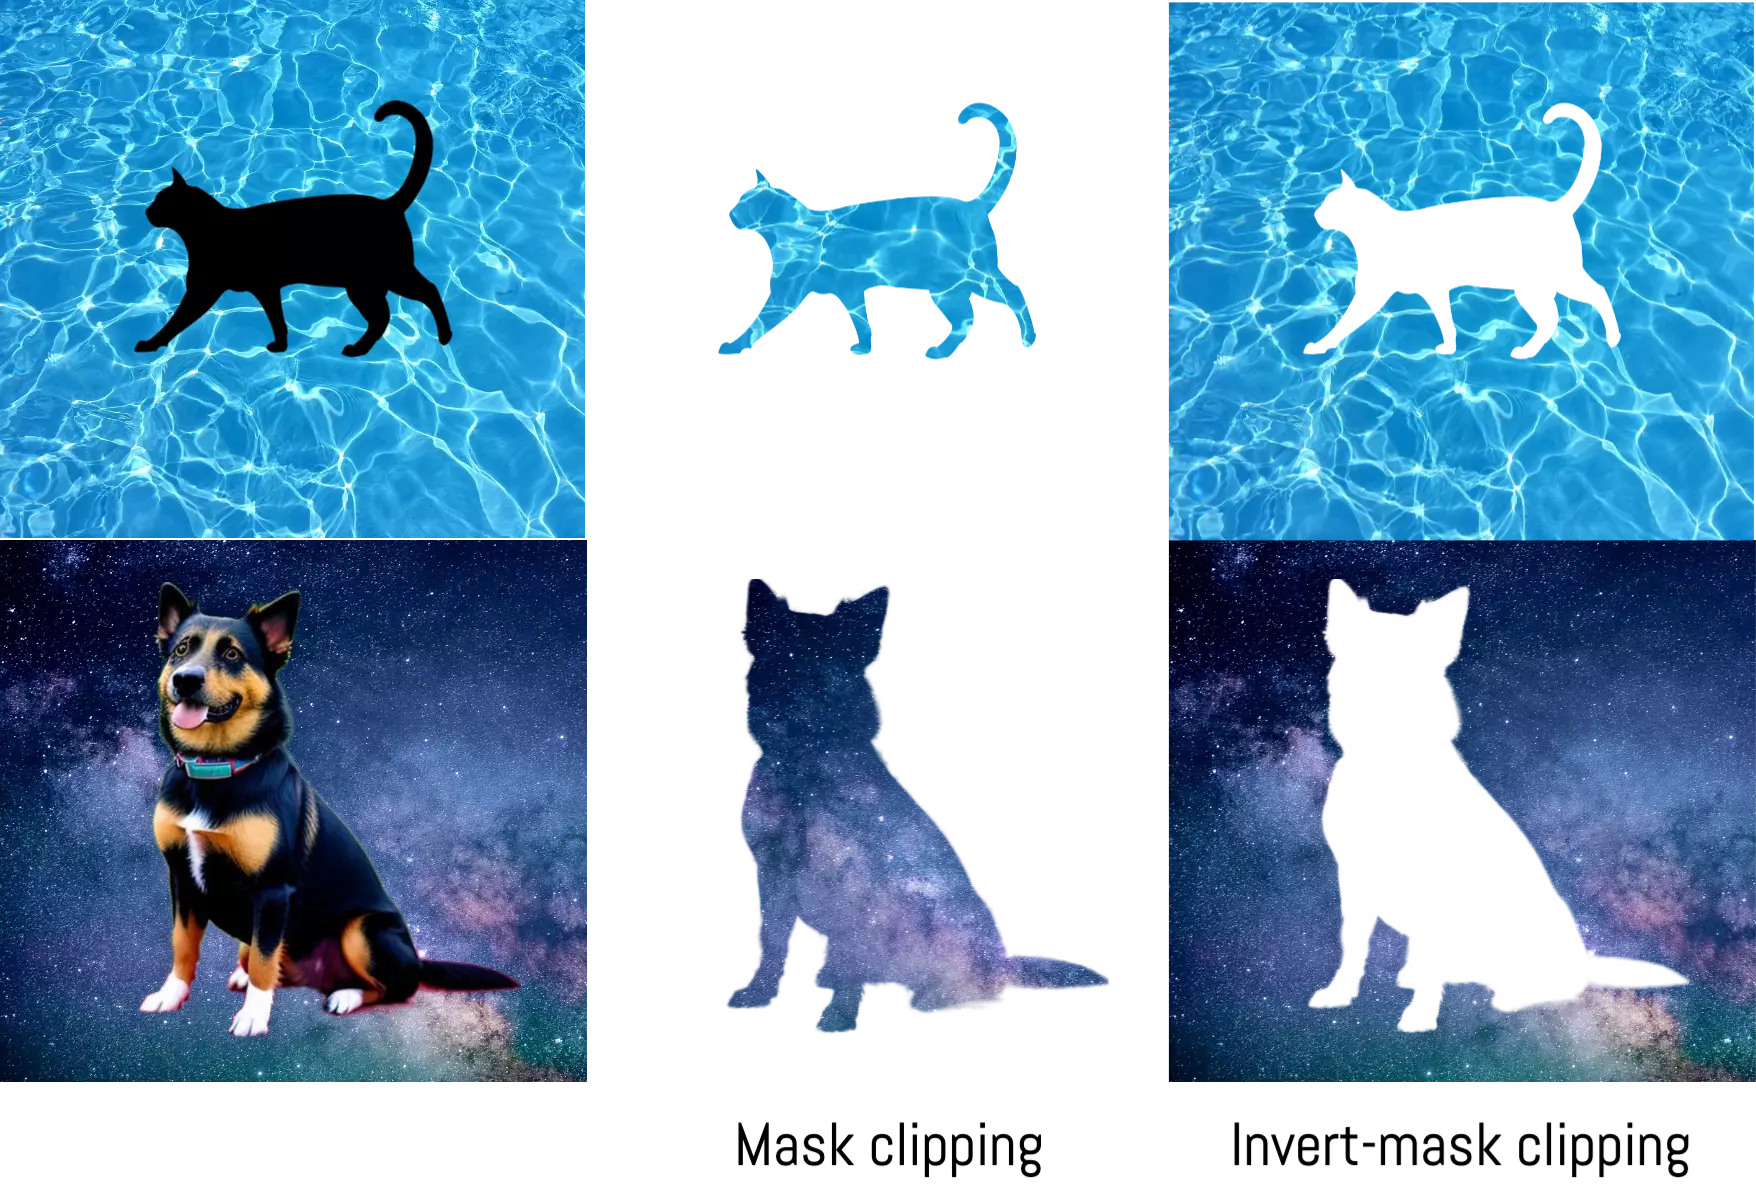
When more than 2 objects are selected, you can treat the top-layer object as a mask and the rest of selected objects as an underlying object group.
Alignment
Alignment actions provide a convenient way to precisely arrange and position objects on the canvas. These actions allow you to effortlessly align selected objects relative to each other or with respect to the design frame. With alignment options such as aligning objects horizontally or vertically, distributing objects evenly, you can achieve pixel-perfect precision in your designs. These actions streamline the layout process, ensuring consistency and professional aesthetics. Whether you need to create symmetrical compositions, organize elements in a grid, or align objects along specific axes, the alignment actions simplify the task, saving you time and effort while enhancing the overall visual harmony of your design.
![]() Align left
Align left
![]() Align horizontal centers
Align horizontal centers
![]() Align right
Align right
![]() Align top
Align top
![]() Align vertical centers
Align vertical centers
![]() Align bottom
Align bottom
When three or more objects are selected, the distribution buttons are enabled.
![]() Distribute Horizontally
Distribute Horizontally
![]() Distribute Vertically
Distribute Vertically
Batch Setting (Outline, Color/Image Fit, Shadow)
Rasterize to Image
| |
|
|