Image Actions
In addition to the common actions available for all object types, images possess a diverse range of unique and powerful operations that can greatly enhance their visual appeal. The figure below shows the list of image-specific actions, including reimagination, filters, cutout, inpaint, upscale, visual search, and painting.
- Reimagination
- Filters and Effects
- Object Cutout
- Object Remove and Inpaint
- Upscale and Enhance
- Find Similar Images
- Painting

Reimagination
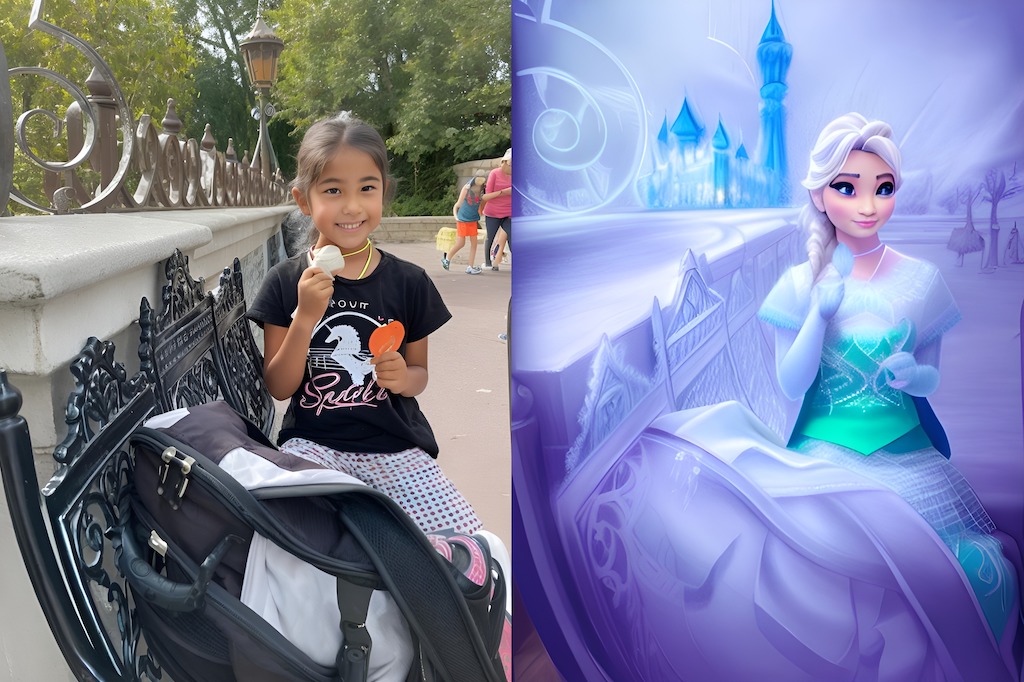
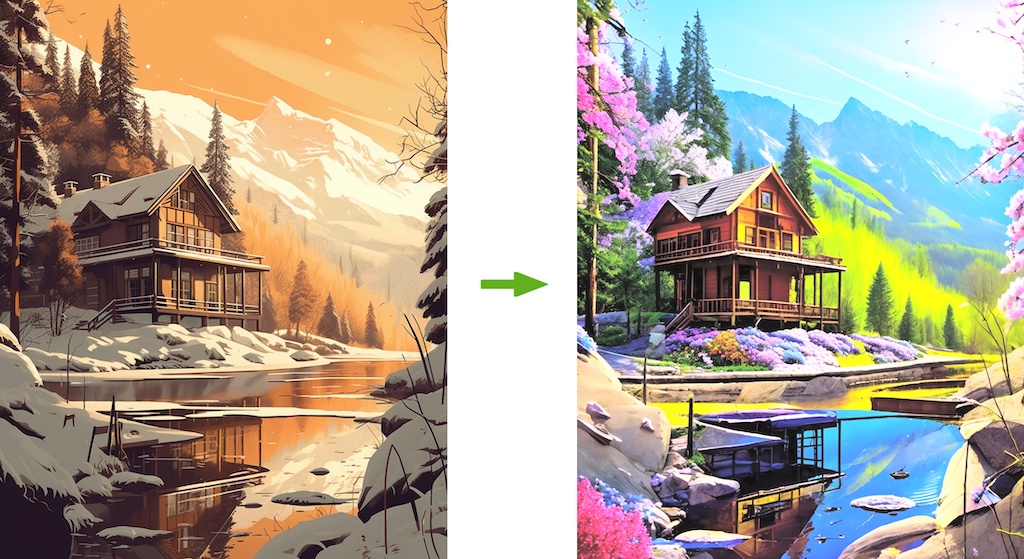
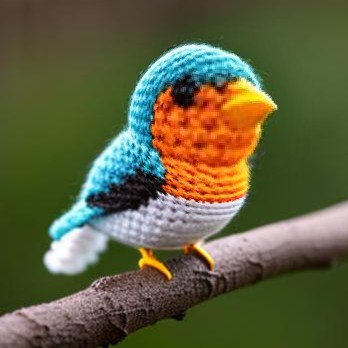
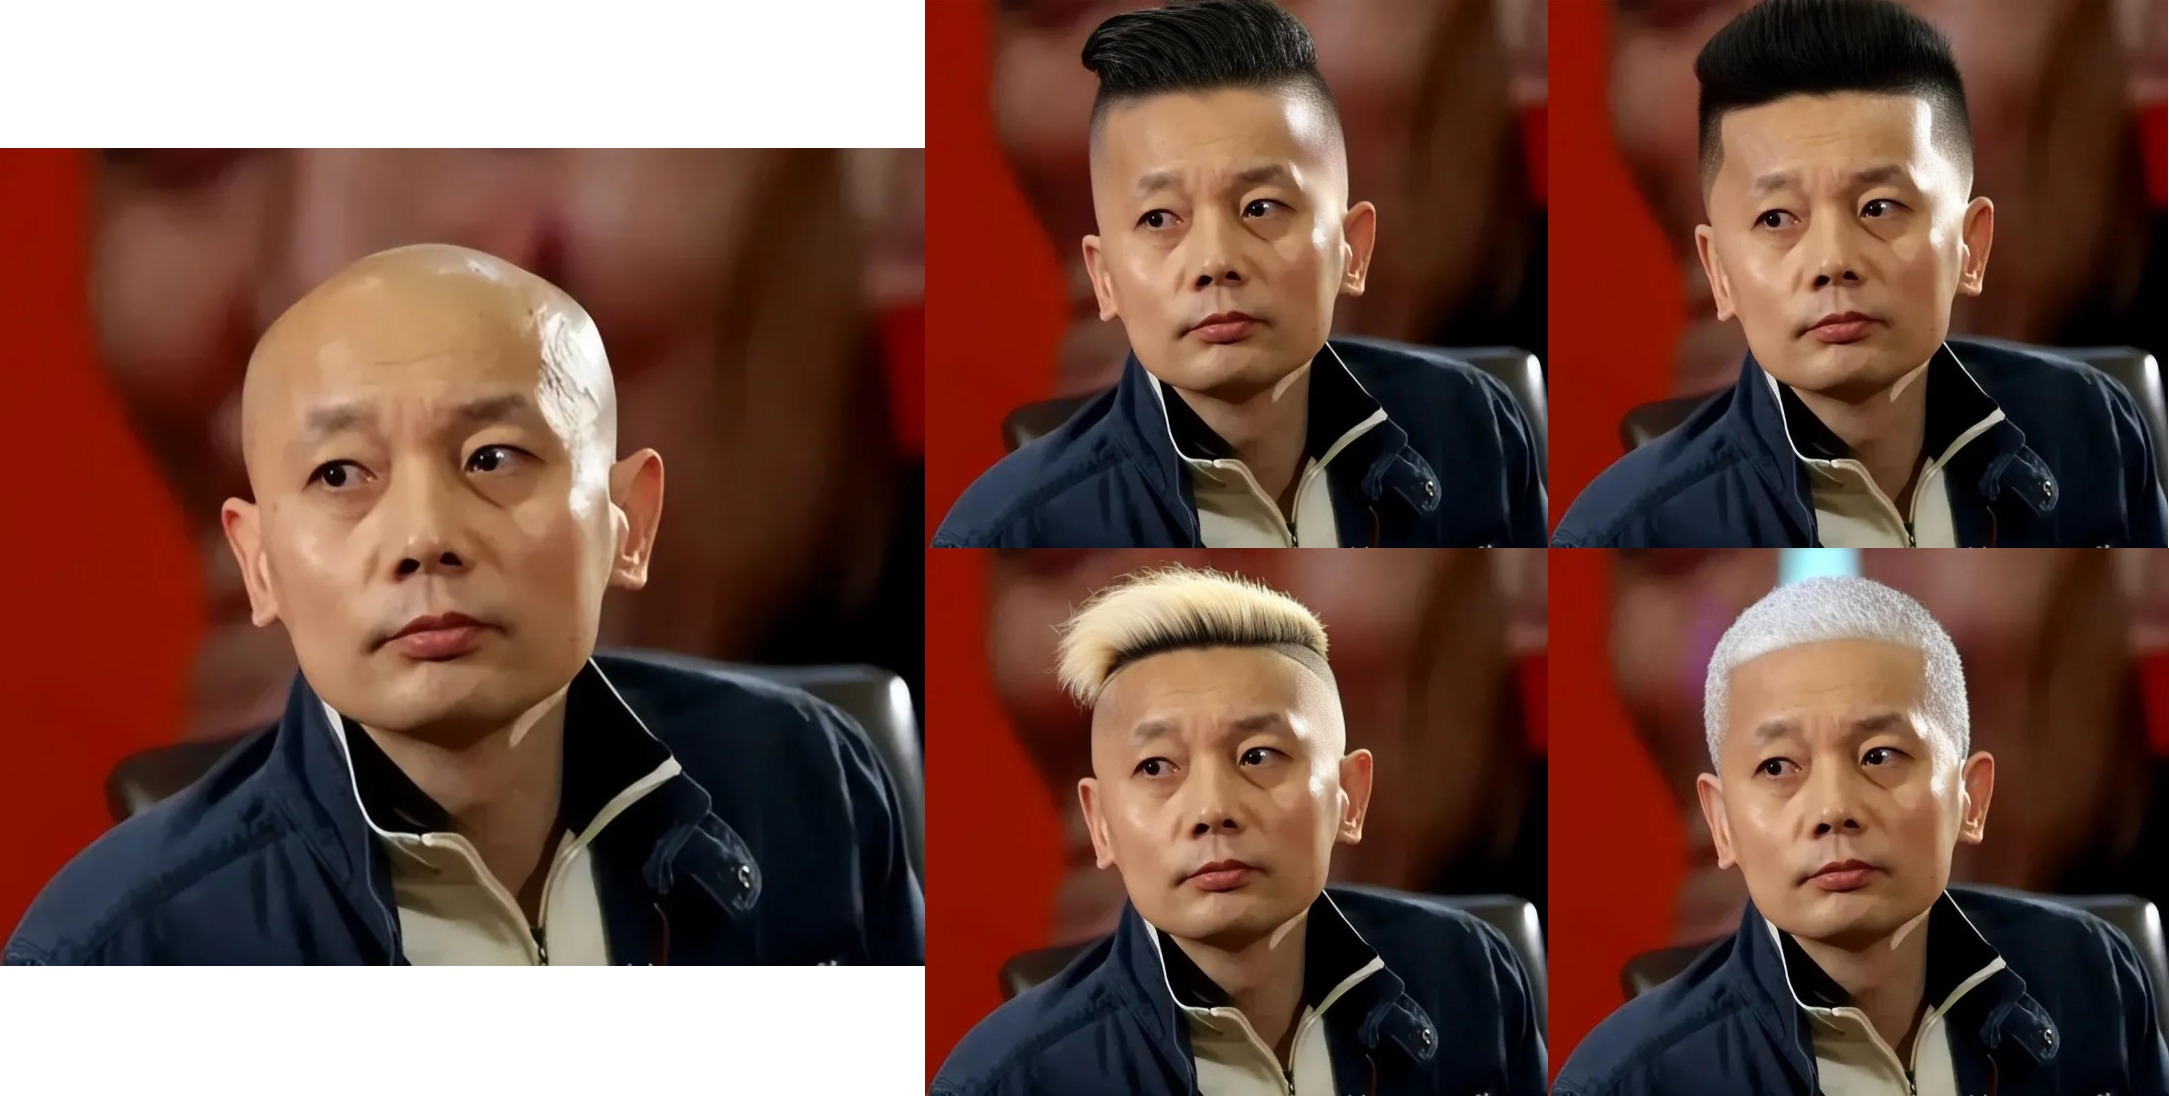
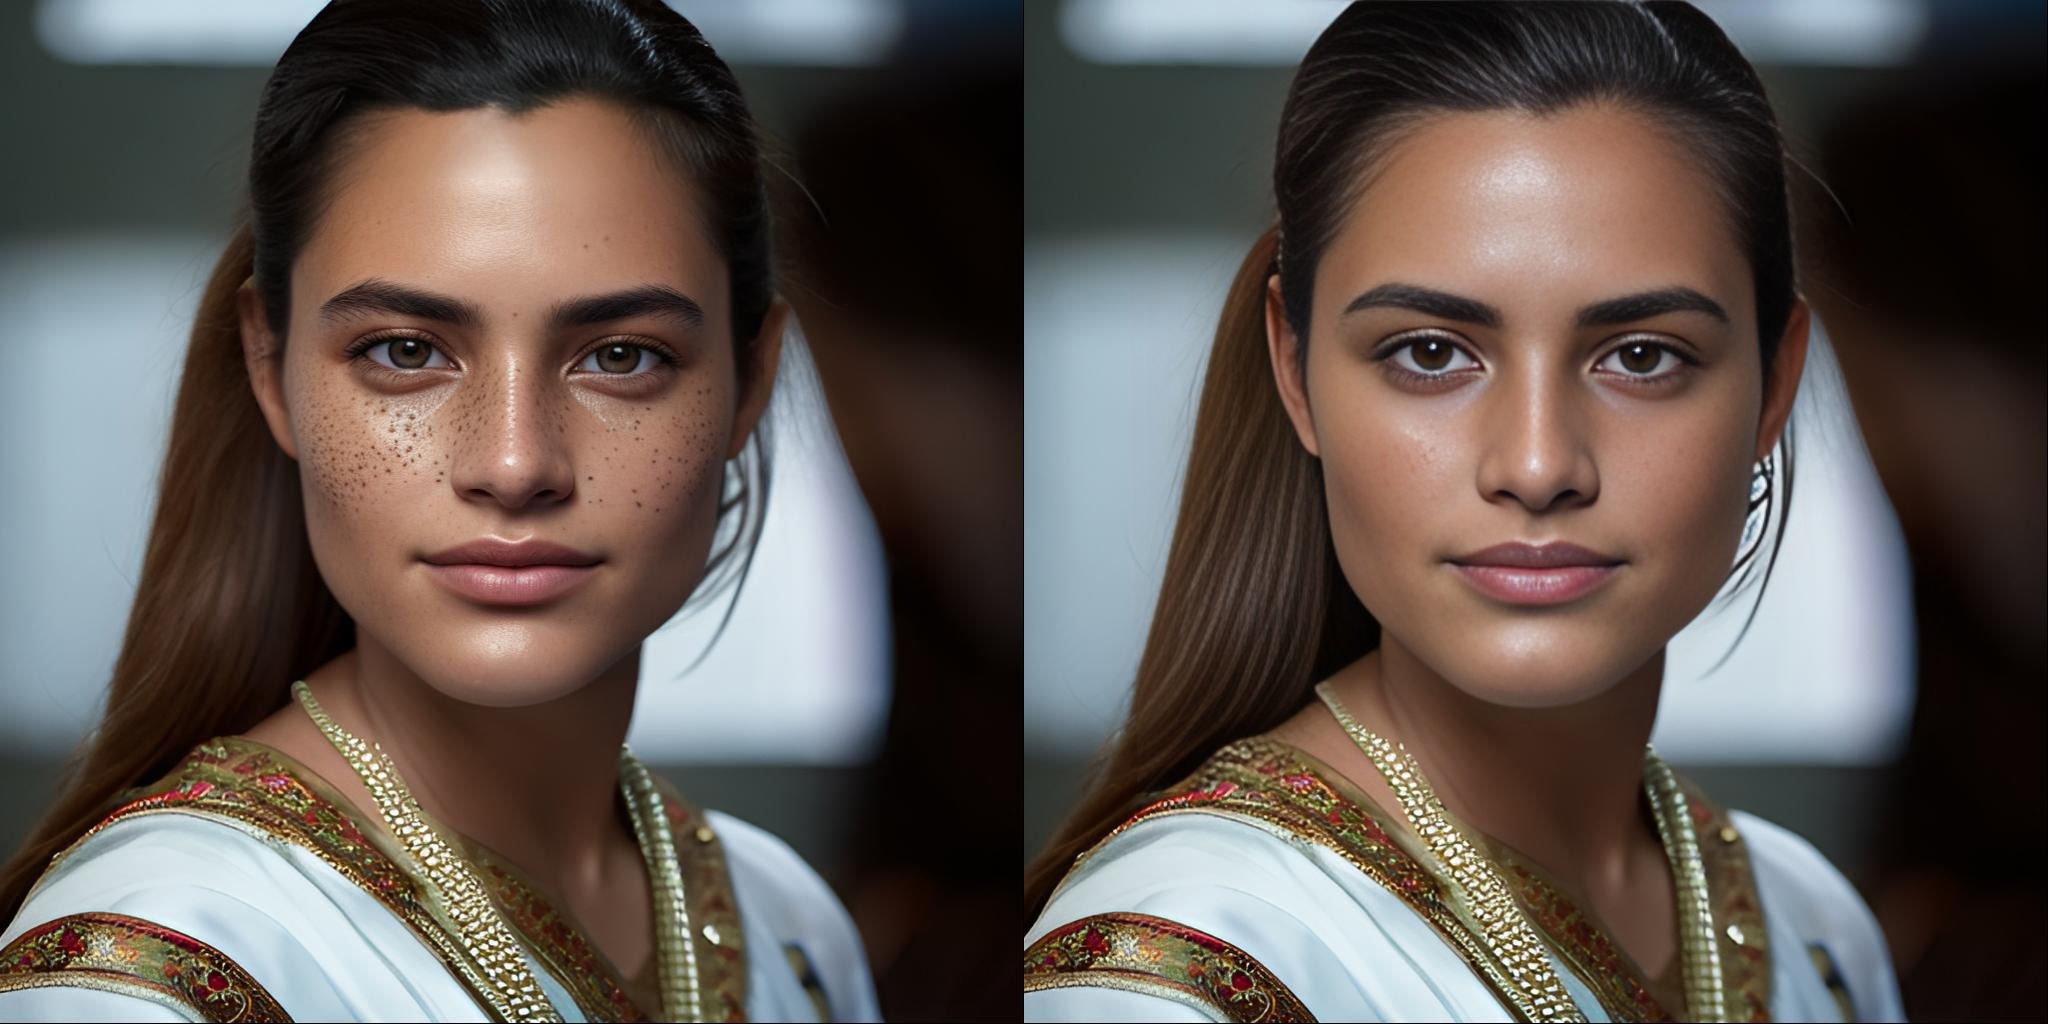
Reimagination is a remarkably powerful operation when it comes to manipulating images. Through the process of reimagination, you can transform a person into a captivating cartoon character, breathe life into a wintry scene and transform it into a blossoming springtime picture, or artistically transform a simple photograph into a stunning watercolor masterpiece. The only constraint that exists in this realm is the limit of your own imagination. The possibilities for visual creativity are boundless, and reimagination grants you the magic power to make extraordinary imagery.
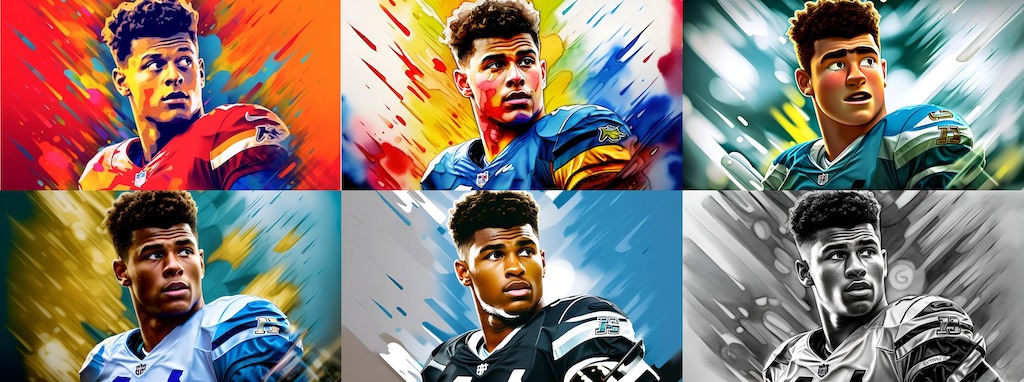
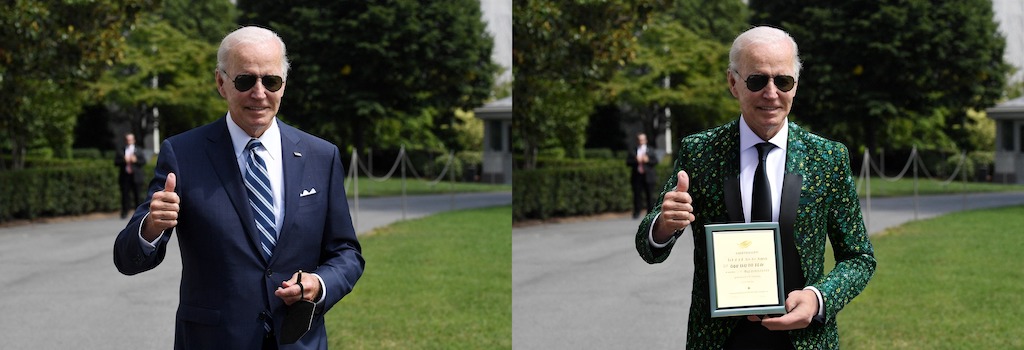
Here are a few illustrative examples that showcase the transformative capabilities of the "Reimagination" operation in action.

Based on the information it preserves, Reimagination has three different controls:
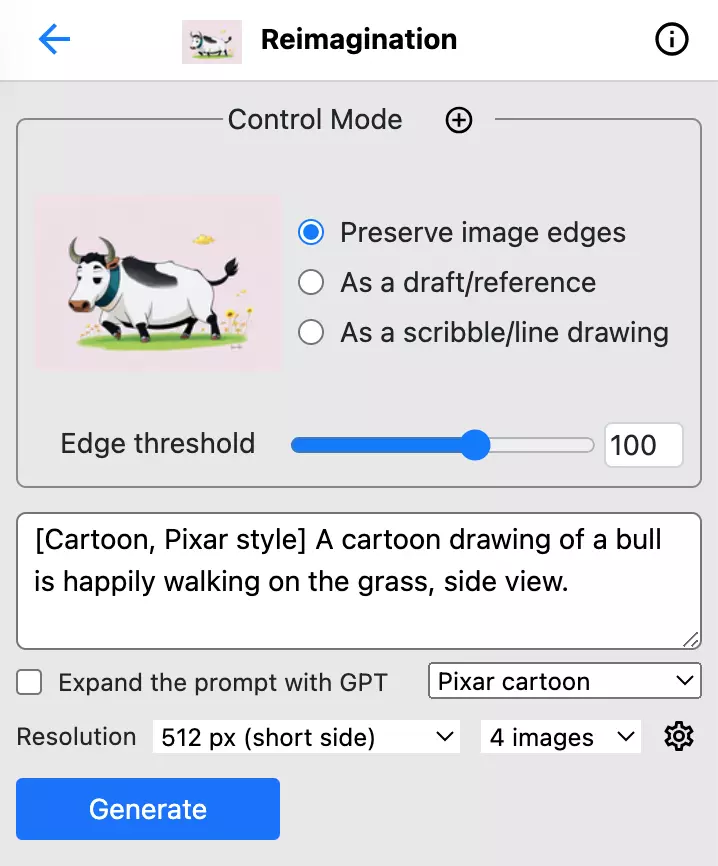
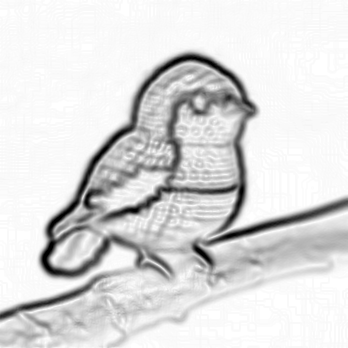
- Preserve image edges: Generated image will keep original image's edges. The amount of edges to preserve is based on the "Edge threshold", where lower values means more edges to preserve.
- As a draft/reference: Generated image will keep start the original image as initial, and the similarity to the original image is controlled by the "Draft fidelity" parameter, where higher values means more fidelity to original image.
- As a scribble/line drawing: Generated image's edges will look similar as the image.
Other than setting the control mode, you should write a text prompt of the image you want to generated, including the style, which you can choose from 50+ preset styles . Furthermore, you have the freedom to determine the resolution of the resulting image as well as the number of samples you wish to generate. It is worth noting that the AI credit required for each generated image is proportionate to the number of pixels it encompasses, signifying that higher-resolution outputs necessitate more credits. As a practical approach, it is often advisable to commence with a 512px resolution and then progress to 1024px once the initial 512px version achieves the desired outcome.
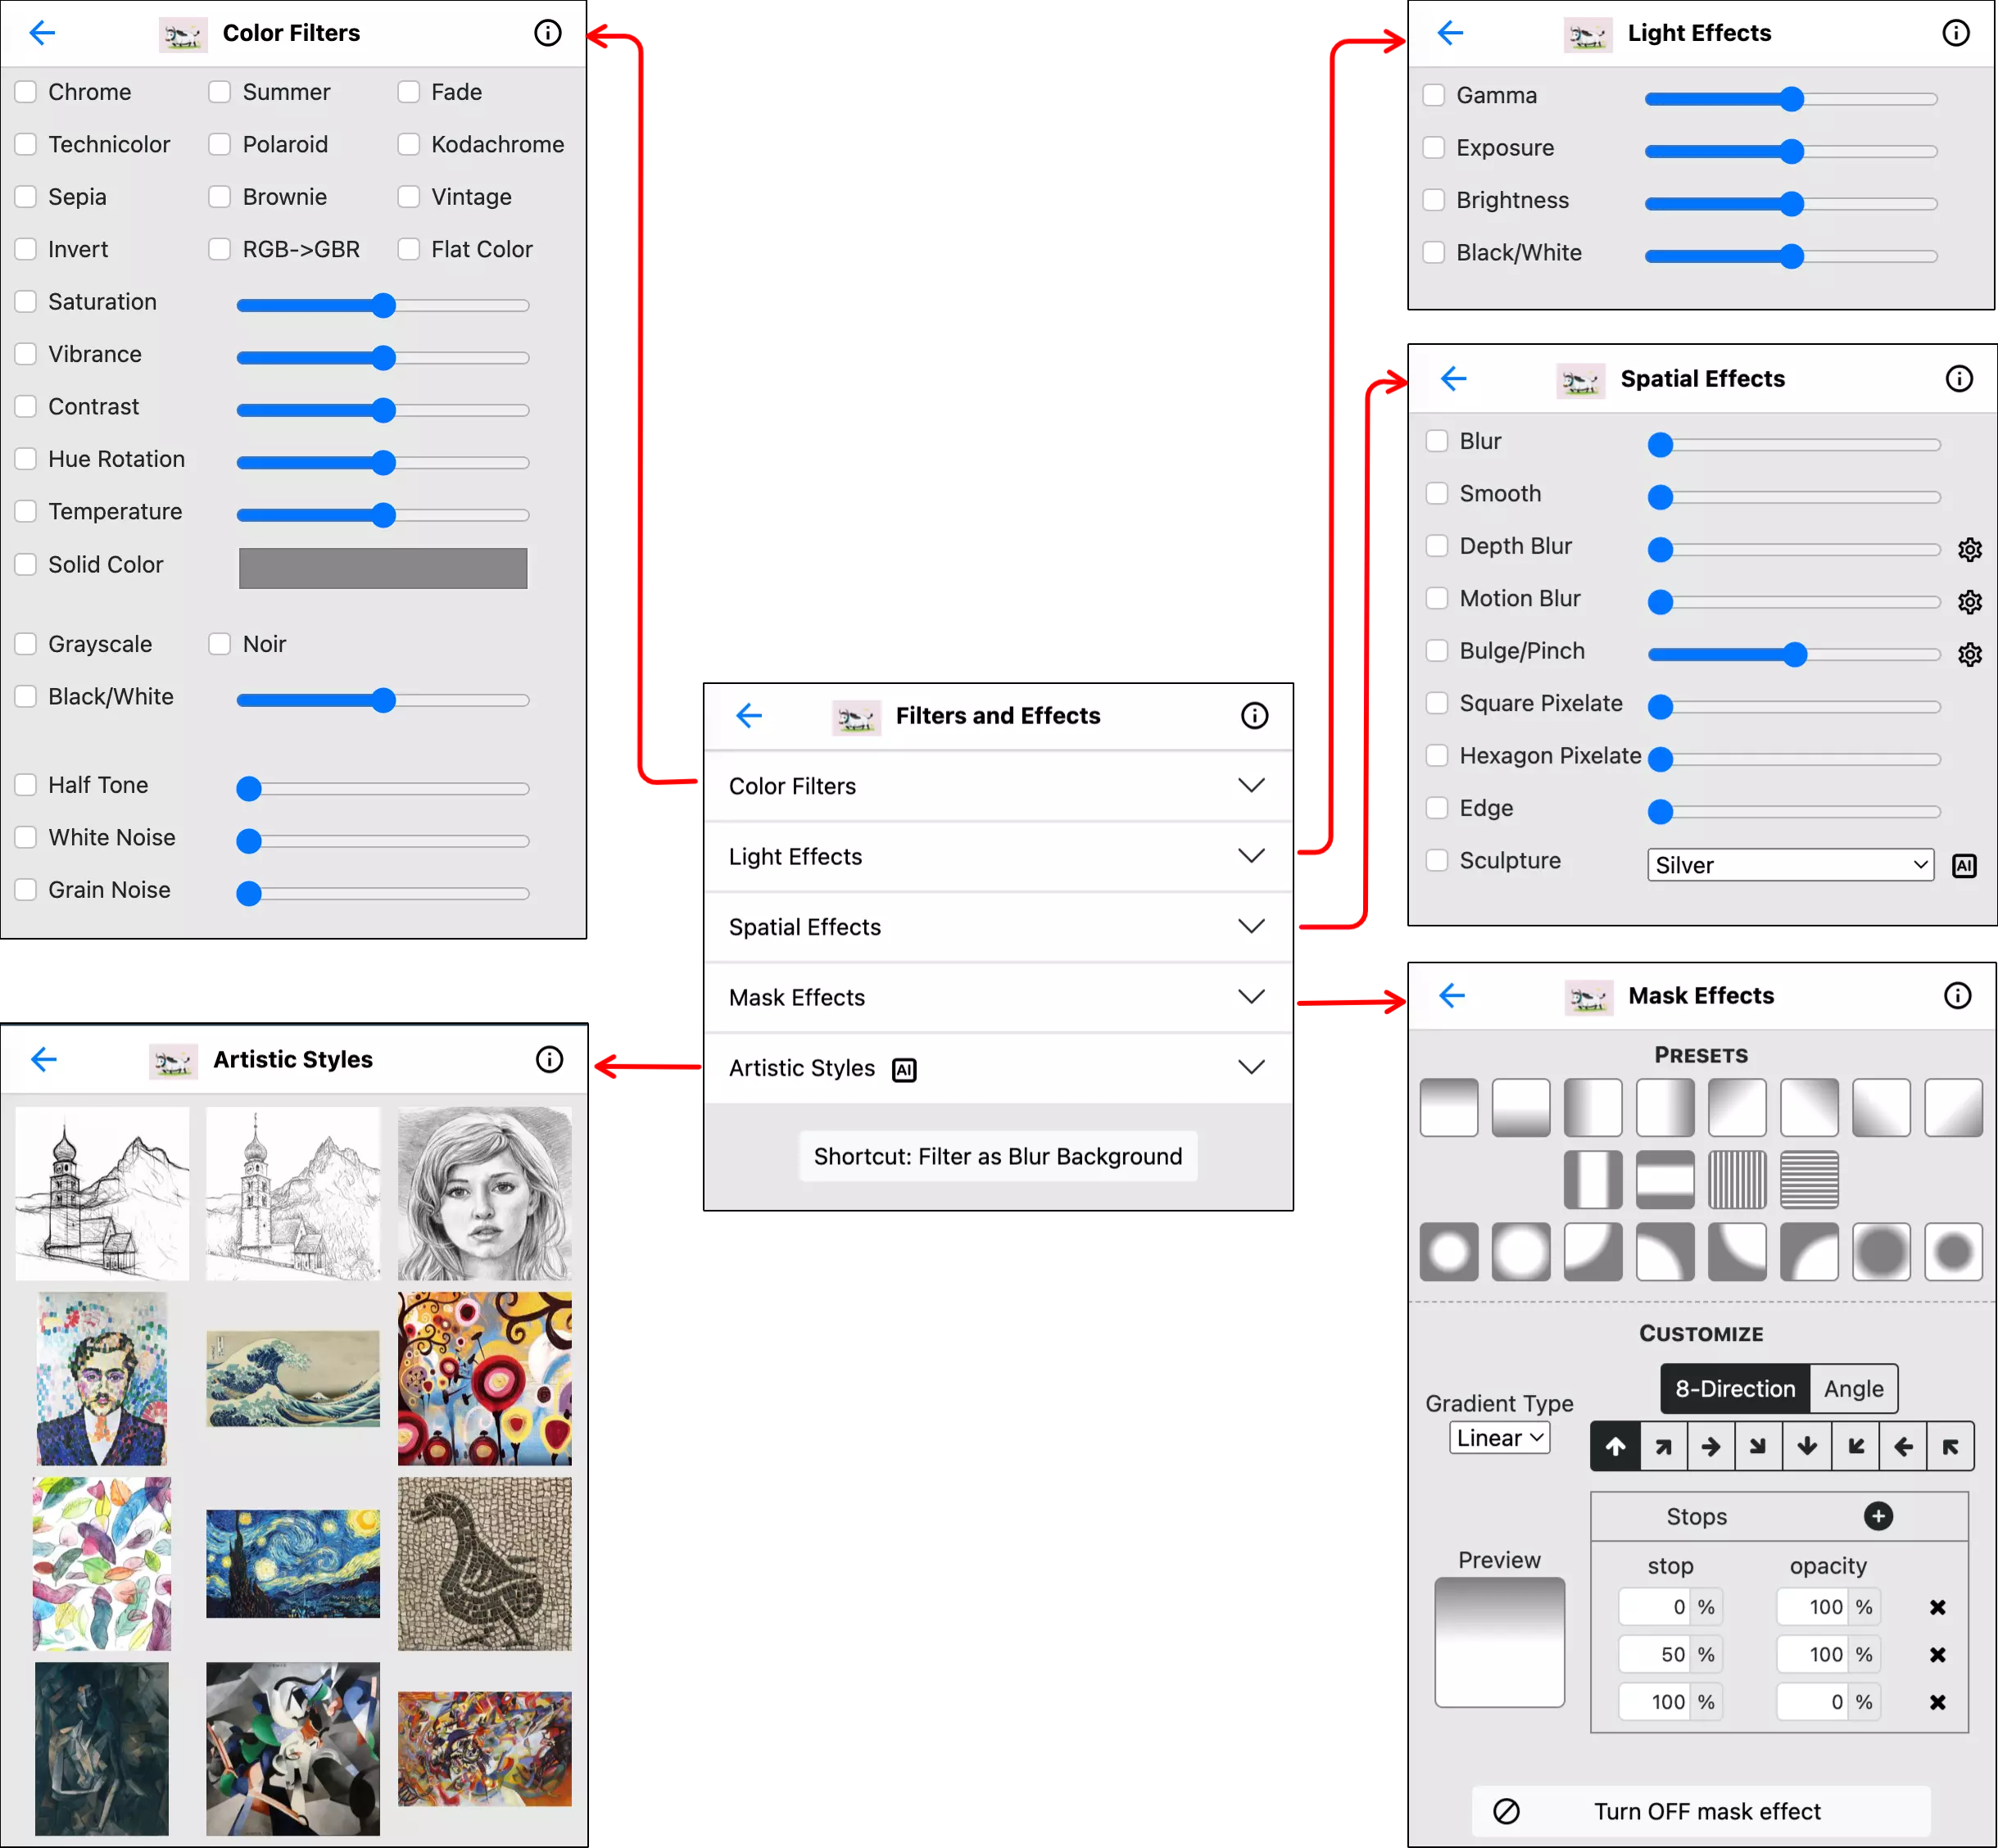
Filters and Effects
PhotoFairy offers a robust collection of image filters, leveraging the power of WebGL to deliver real-time filtering on device. From classic color filters like chrome, grayscale, and vignette, to spatial filters such as blurring, motion blurring, bulge/pinch, and etc. These filters are grouped into 5 categories:
- Color filters: color filters are applied to alter the hues, saturation, or tone of specific color channels, enabling precise adjustments to the color balance and overall appearance of an image.
- Light filters: light filters are a group of filters that changes the brightness of an image.
- Spatial filters: spatial filters are a collection of filters that operate on pixel neighborhoods, offering a range of effects including blurring, adaptive smoothing, motion blur, bulge/pinch distortion, pixelation, and edge detection, etc.
- Mask effects: mask effects alter image's opacity channel, creating transparent effects of different geometric mask.
- Artistic styles: artistic styles transform an image into another style specified by the style image, by preserving the content of the original image and incorporating the desired style characteristics.
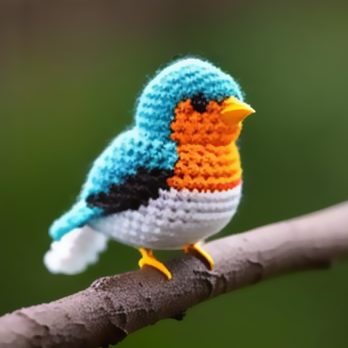
Demo of spatial filters

Object Cutout
Object cutout is an important operation in graphic design and photo editing, which enables a variety of creative possibilities and practical applications. Here are some of the things you can do with object cutout:
- Background Removal: Object cutout enables you to remove the background from an image, isolating the object or subject. This is useful when you want to replace the background with a different image or create a clean, distraction-free composition.
- Image Compositing: By cutting out objects, you can seamlessly integrate them into different scenes or backgrounds, creating visually appealing and cohesive compositions. This technique is commonly used in advertising, product photography, and digital artwork.
- Collages and Montages: Object cutout enables you to create collages or montages by combining multiple images together. You can cut out various objects and arrange them in a cohesive manner, allowing for imaginative and artistic creations.
- Selective Editing: With object cutout, you can isolate specific objects or areas within an image for targeted editing. This allows you to apply adjustments, enhancements, or effects to only the selected objects, while leaving the rest of the image unaffected.
- Design Elements and Graphics: Cutout objects can be used as standalone design elements or graphics in various projects. They can be incorporated into logos, icons, illustrations, website designs, and more, adding visual interest and enhancing the overall aesthetics.
Overall, object cutout provides flexibility, precision, and creative freedom in graphic design and photo editing, enabling you to manipulate and enhance images in versatile and imaginative ways.
PhotoFairy's advanced hierarchical image decomposition functionality effortlessly segment images at various levels of detail, allowing you to flawlessly extract objects or specific regions with unparalleled precision. The figure below shows a screenshot of object cutting out in action.
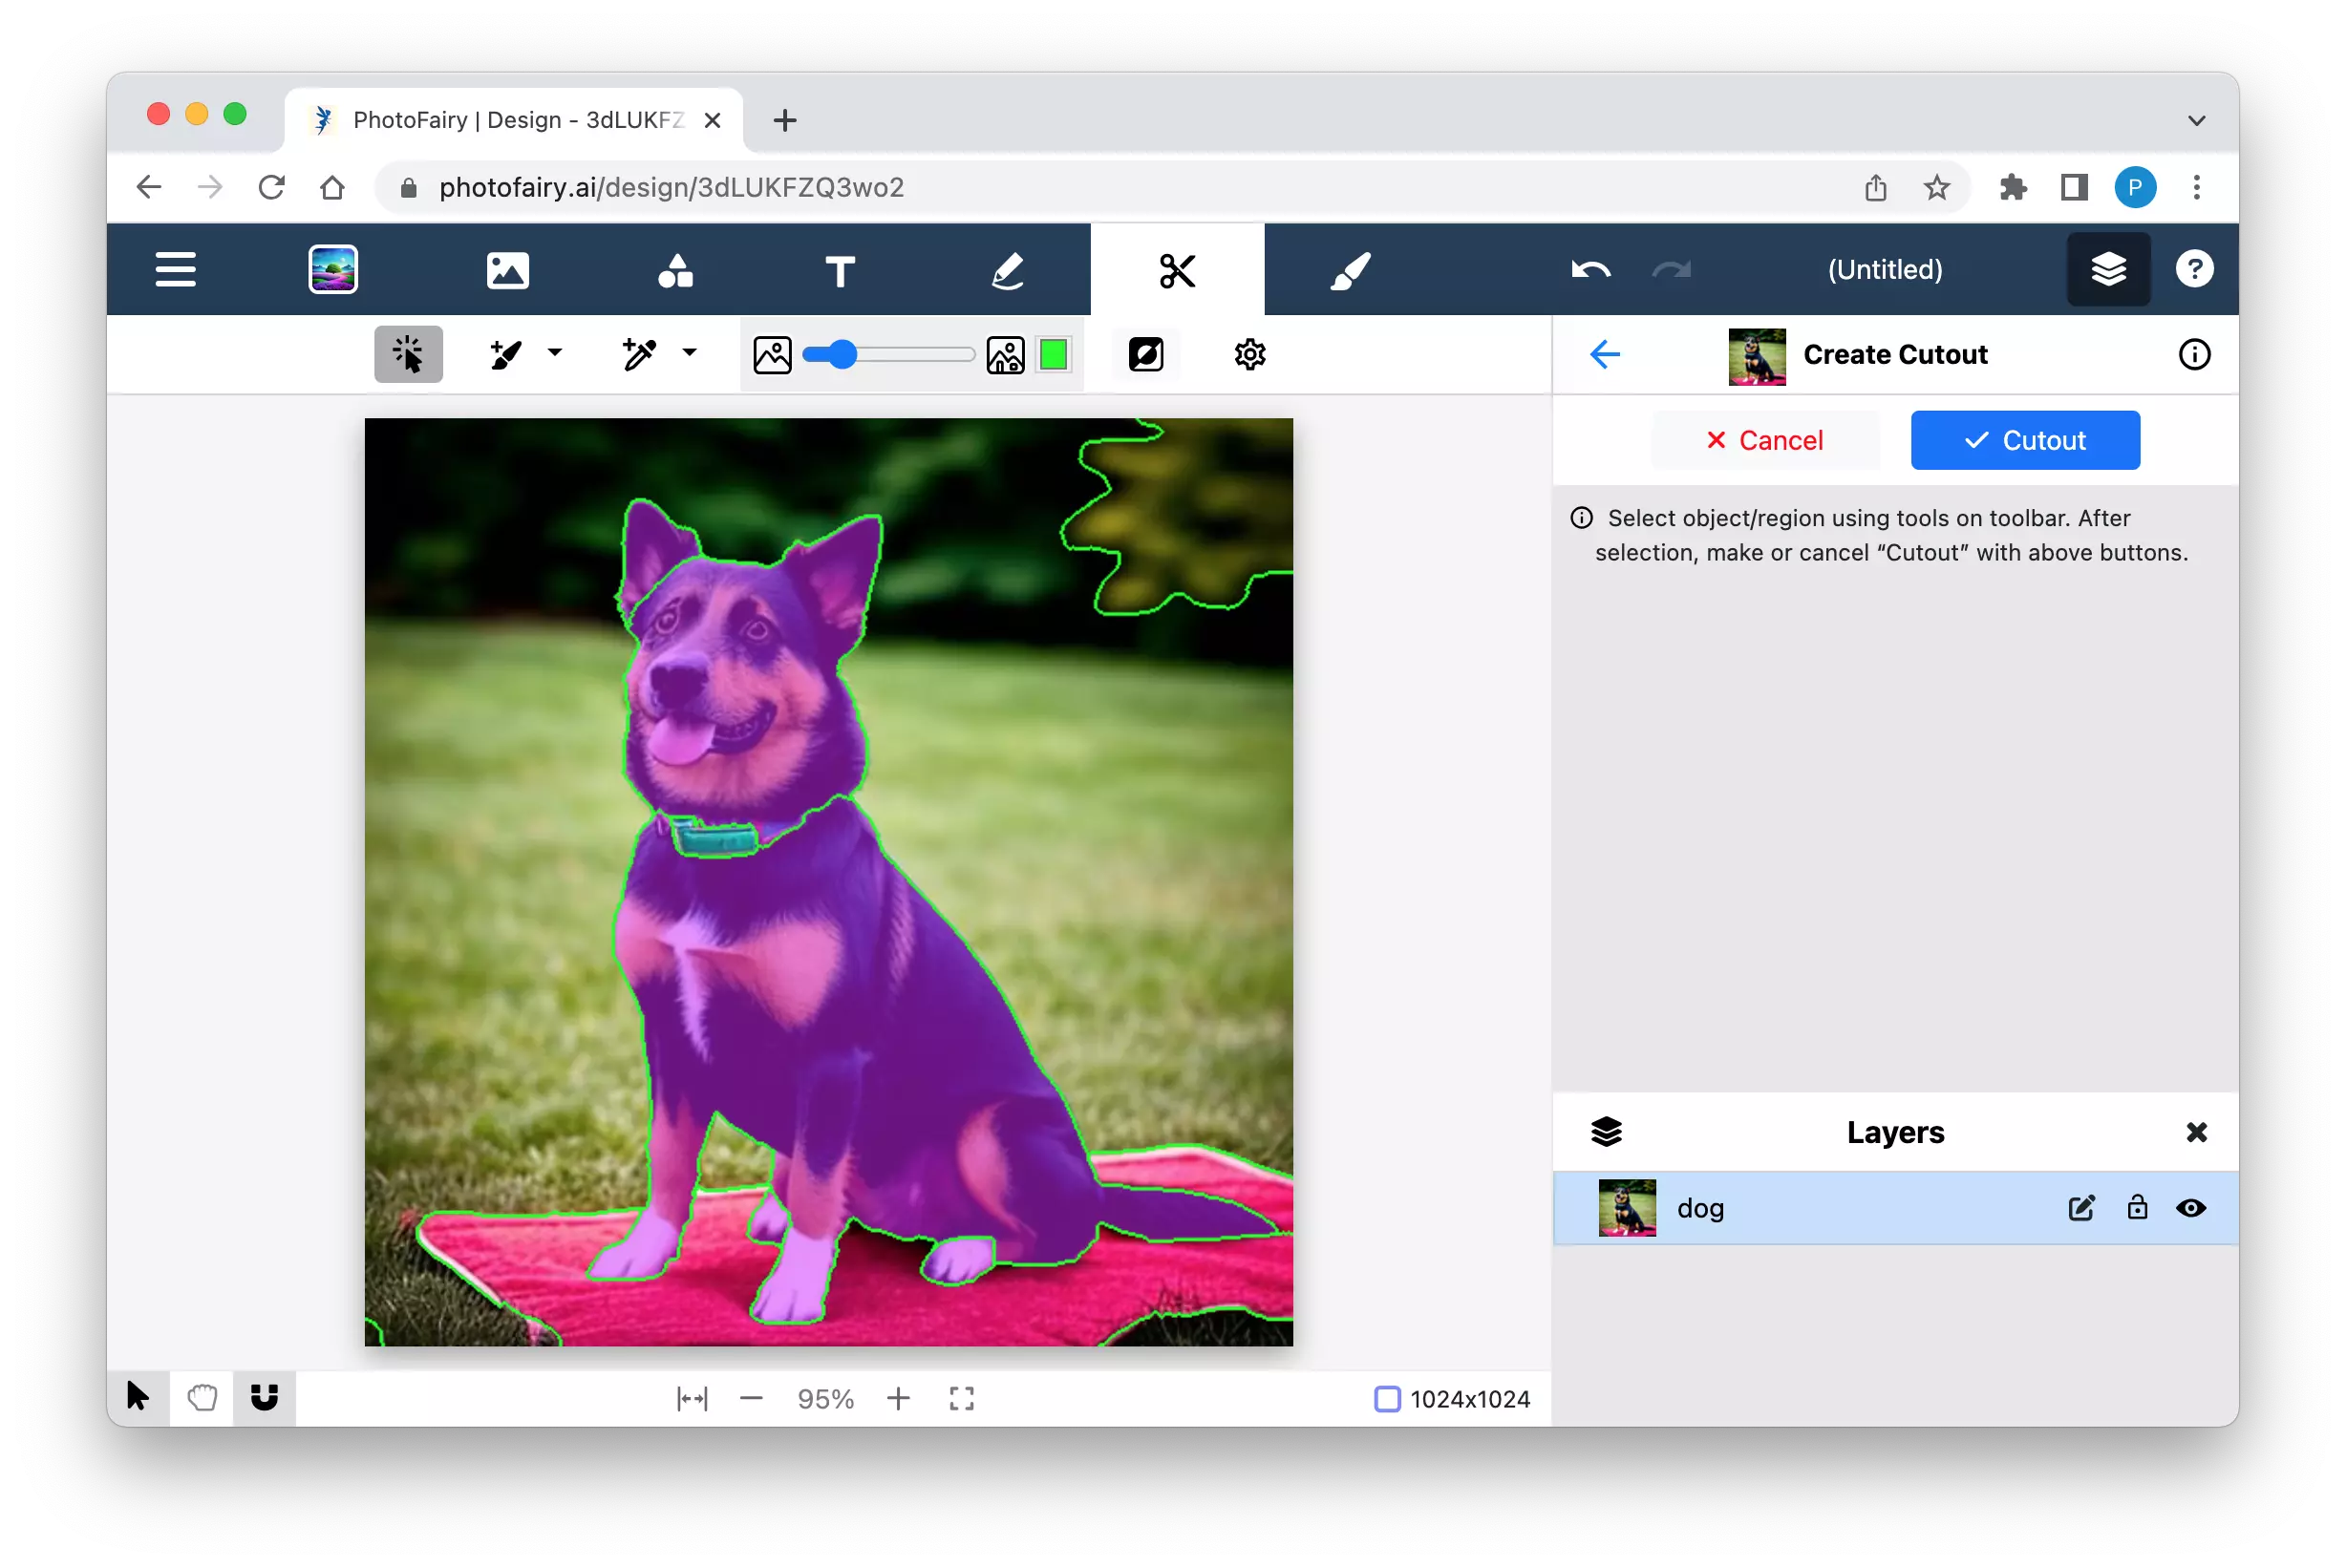
The object selection toolbar is annotated and shown below. There are three major selection tools: AI-powered click selection tool, brush-based selection tool, and color-based selection tool. The default AI-powered click selection tool stands out as the most powerful and convenient option. Brush-based selection tool is useful to fine adjust selection boundaries with a brush. Color-based selection tool is useful for selection regions of distinct colors. Each selection tools have a slider controlling the granularity of selection. The "invert selection" button is designed to reverse the current selection, making it particularly useful when selecting the opposite becomes more straightforward.
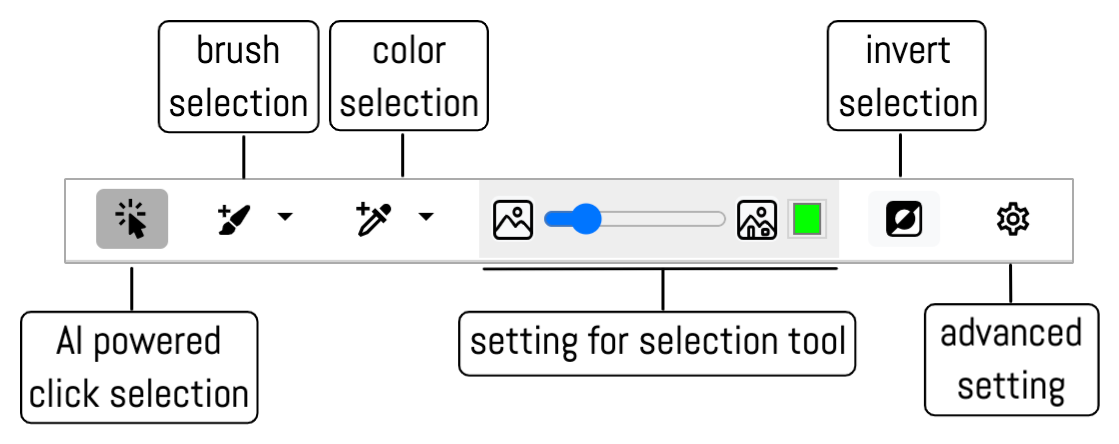
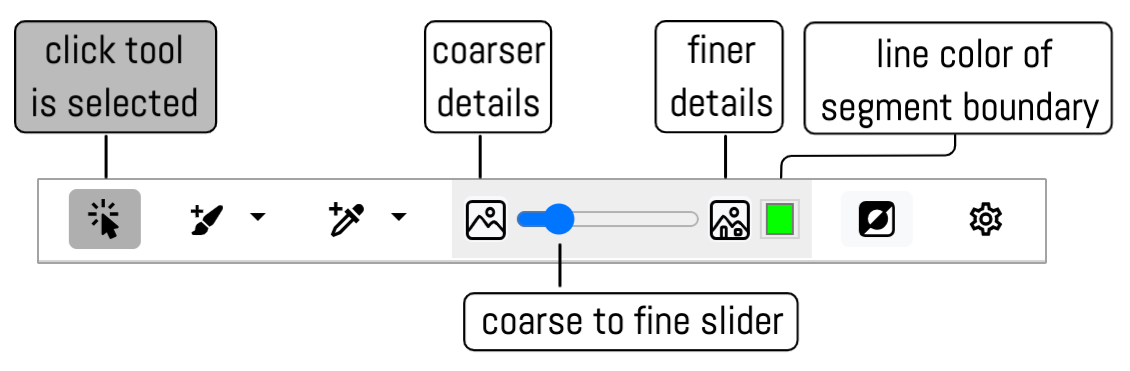
When the click selection tool is activated, its associated settings GUI appears in the center of the toolbar, as depicted in the annotated figure below. The GUI includes a slider for adjusting the level of detail from coarse to fine, along with two incremental adjustment buttons, as well as a boundary color option. By adjusting the slider, the image in the canvas is decomposed into regions at different segmentation granularity. It is important to note that the segmentation is hierarchical, so when you change from coarse level to finer level, the coarse boundaries are preserved. The selection process is simple: to select a region, simply click anywhere inside it; and to deselect an already selected region, again simply click anywhere inside it.
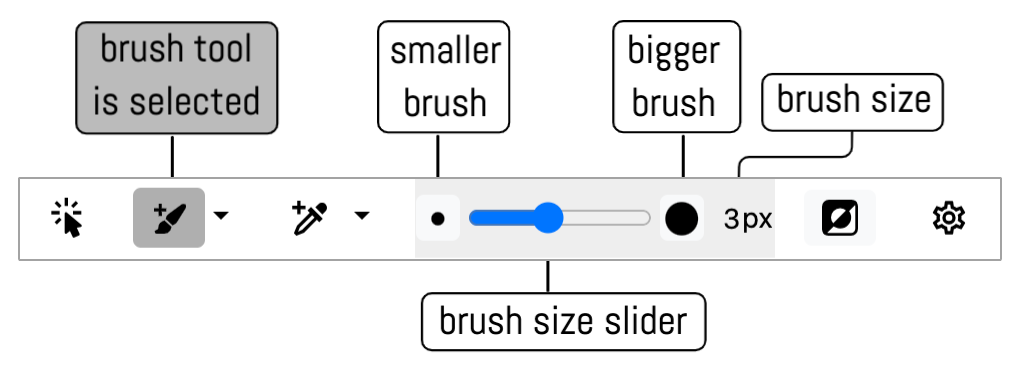
When the brush selection tool is activate, the brush size setting GUI shows up in the middle of the toolbar. Clicking on the button again will toggle between plus-mode (add to selection) and minus-mode (remove from selection). It can also be chosen from the nearby dropdown button.
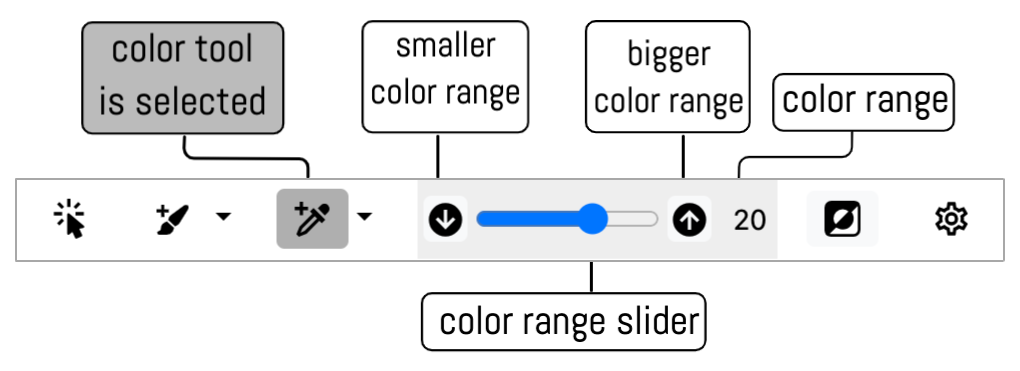
When the color selection tool is activate, the color range setting GUI shows up in the middle of the toolbar. Clicking on the button again will toggle between plus-mode (add to selection) and minus-mode (remove from selection). It can also be chosen from the nearby dropdown button.
![]() The sliders in the selection tools can be adjusted by keyboard shortcuts: and .
The sliders in the selection tools can be adjusted by keyboard shortcuts: and .
Figure below shows a screenshot of the window after object is cutted out. When an object is cutout, it is automatically overlayed on canvas at exactly the same location as it appears on image. The bounding box controls indicate the cutout area. By overlaying at the same location, it is useful to create various kind of visual effects using object cutout.
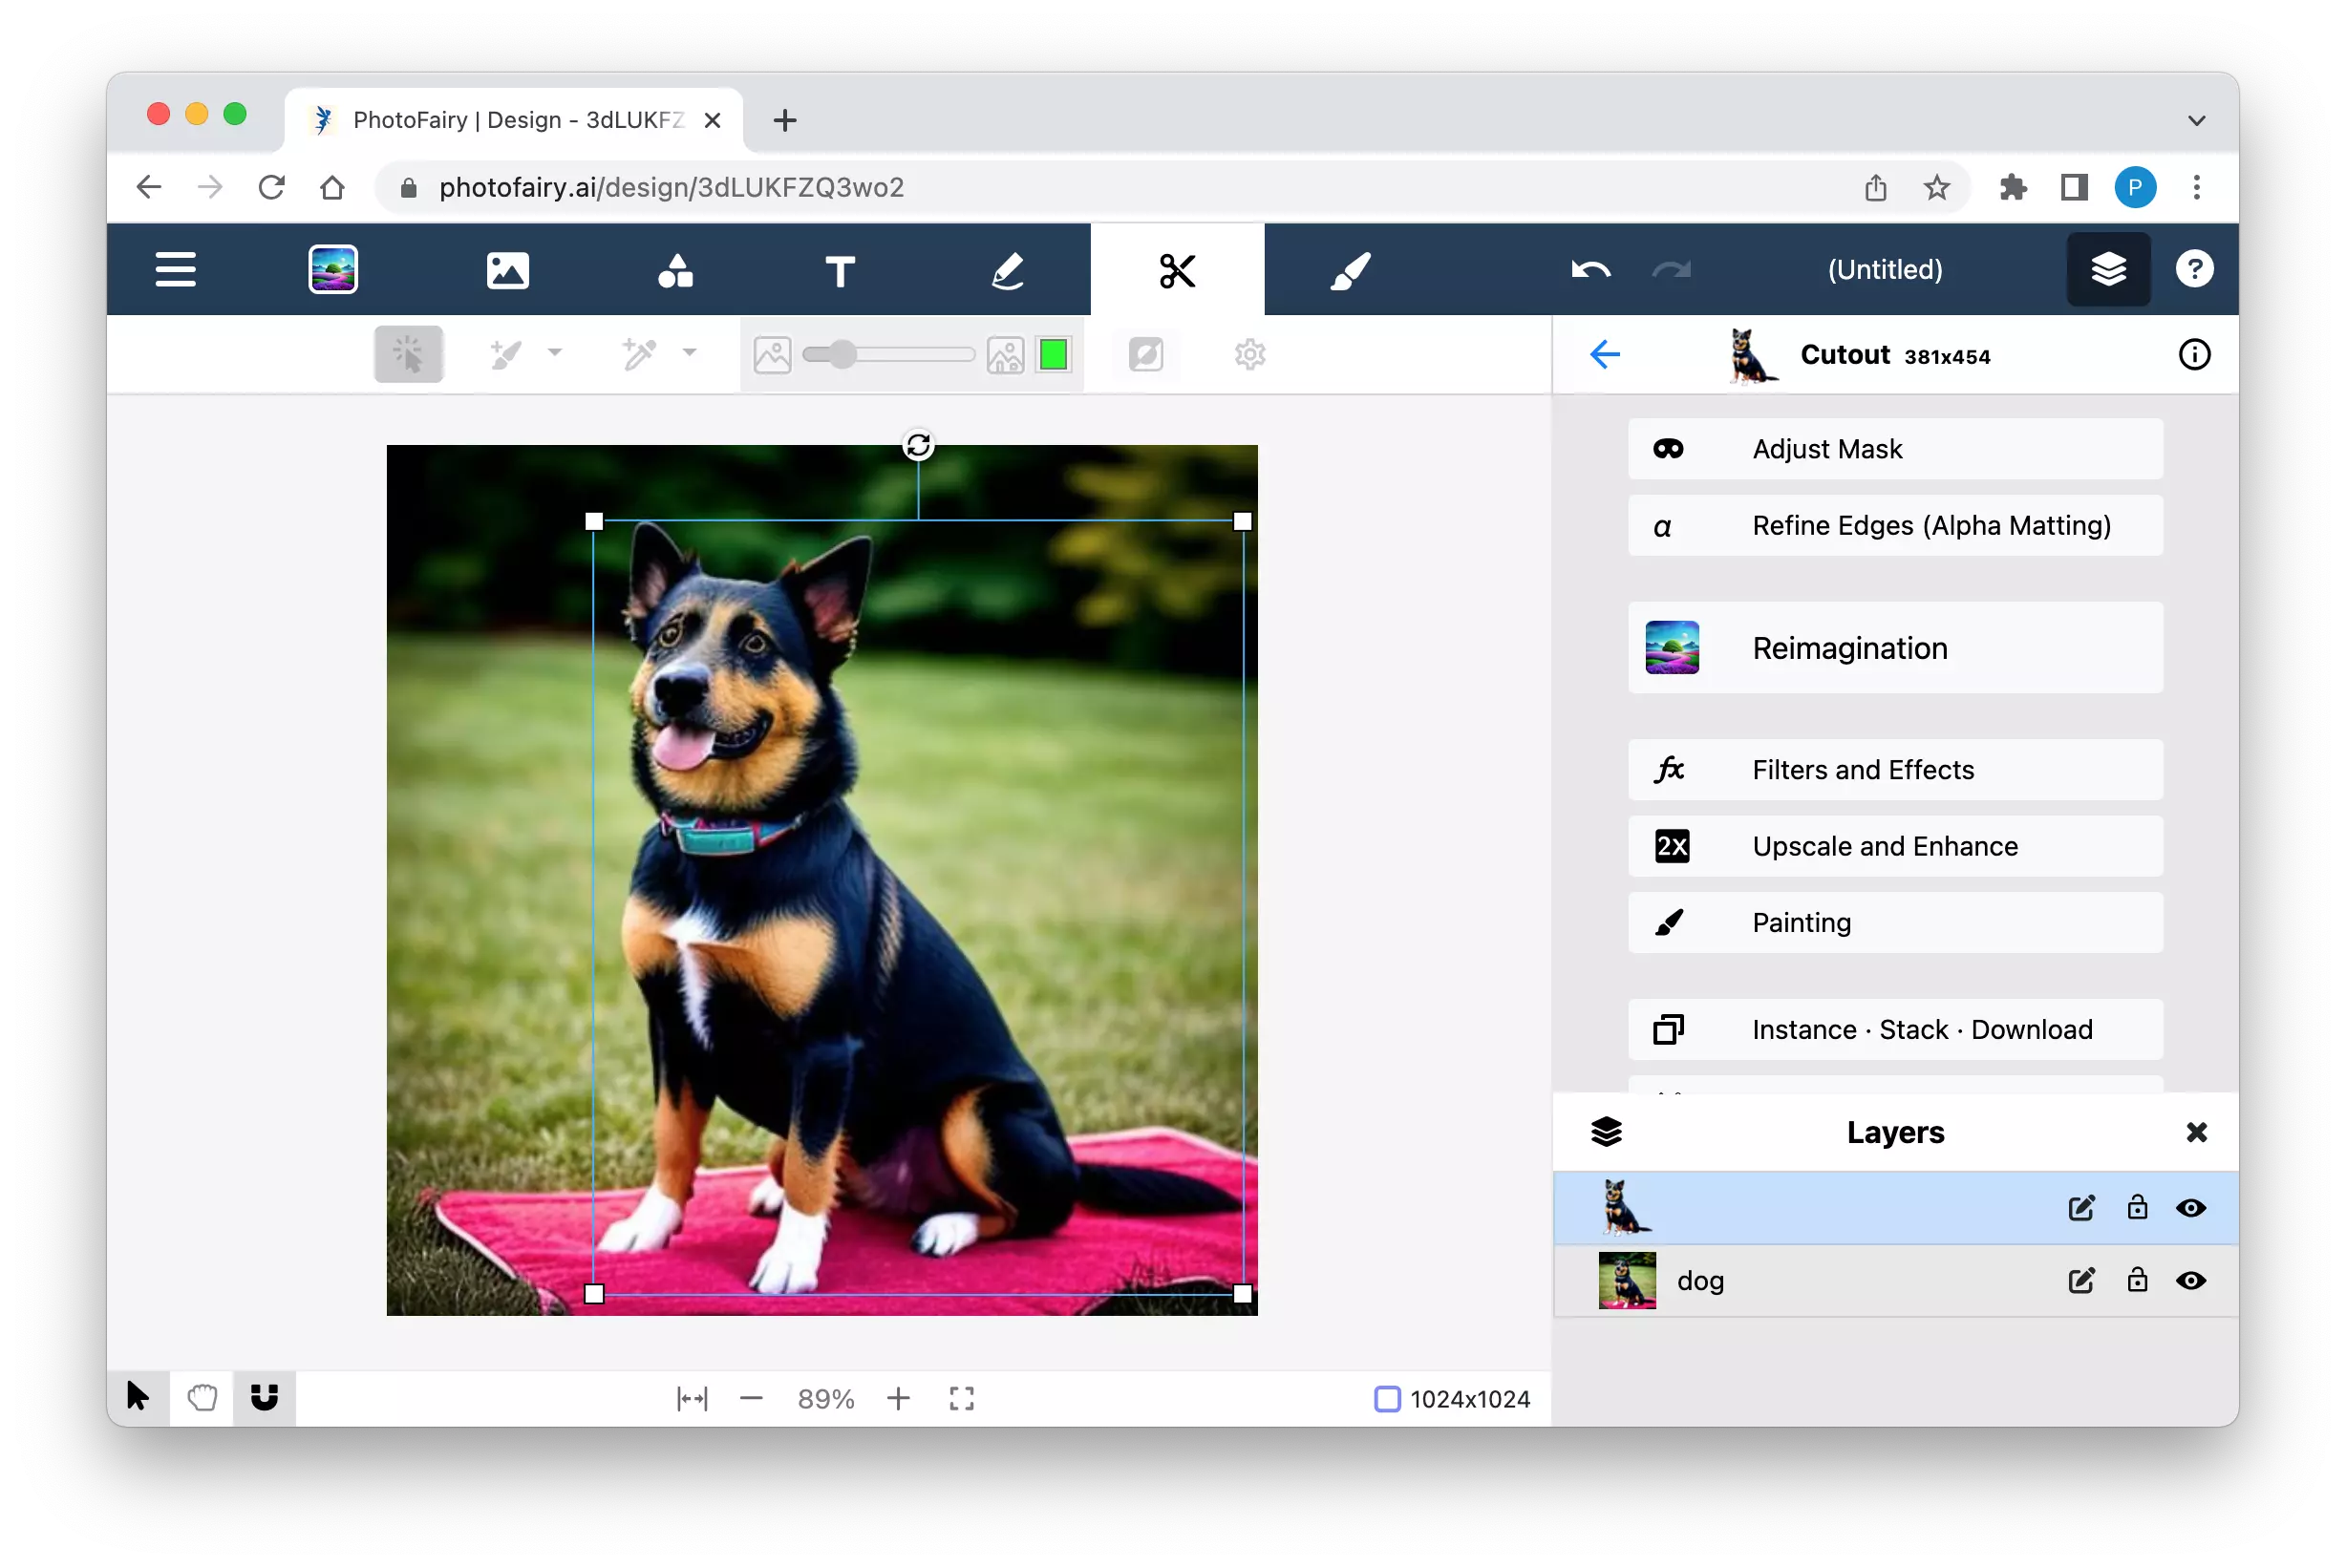
For the cutout, there are additional buttons in the action panel: and . "Adjust Mask" button brings you back to the object selection view, and allows you to adjust the selection. "Refine Edges (Alpha Matting)" will refines object boundaries to create an alpha channel that represents the transparency levels of pixels, allowing for seamless compositing with different backgrounds.

Object Remove and Inpaint
Object removal and inpainting are powerful techniques in graphic design and photo editing that offer a range of possibilities for enhancing and manipulating images. Here are some of the things you can do with object removal and inpainting:
- Object Removal: With object removal, you can eliminate unwanted elements or distractions from an image. This is particularly useful when there are undesired objects, people, logos, or text that need to be seamlessly removed from a composition. By intelligently filling in the removed areas, the image appears as if the object was never there.
- Background Cleanup: Object removal and inpainting can be used to clean up backgrounds by removing imperfections, such as blemishes, dust spots, or other unwanted elements. This helps create a cleaner and more professional look, especially in product photography or portrait retouching.
- Image Restoration: In cases where old or damaged photographs have missing parts, or AI generated images have artifacts, object removal and inpainting can be used for image restoration. By recreating missing details, such as torn or faded areas, the image can be brought back to its original or enhanced state.
- Creative Manipulation: Object removal and inpainting provide a creative playground for manipulating and transforming images. You can experiment with removing or replacing objects to create surreal or imaginative compositions. This technique is often employed in digital art, conceptual designs, and visual storytelling.
- Content-Aware Fill: Many graphic design and photo editing software offer content-aware fill tools that leverage object removal and inpainting algorithms. These tools analyze the surrounding areas and automatically fill in the removed or selected region with plausible content, resulting in a seamless and natural-looking result.
Overall, object removal and inpainting techniques empower designers and photo editors to refine, restore, and transform images by eliminating unwanted elements, cleaning up backgrounds, and unleashing their creativity. These tools are valuable assets in enhancing visual compositions and achieving desired outcomes in graphic design and photo editing projects.
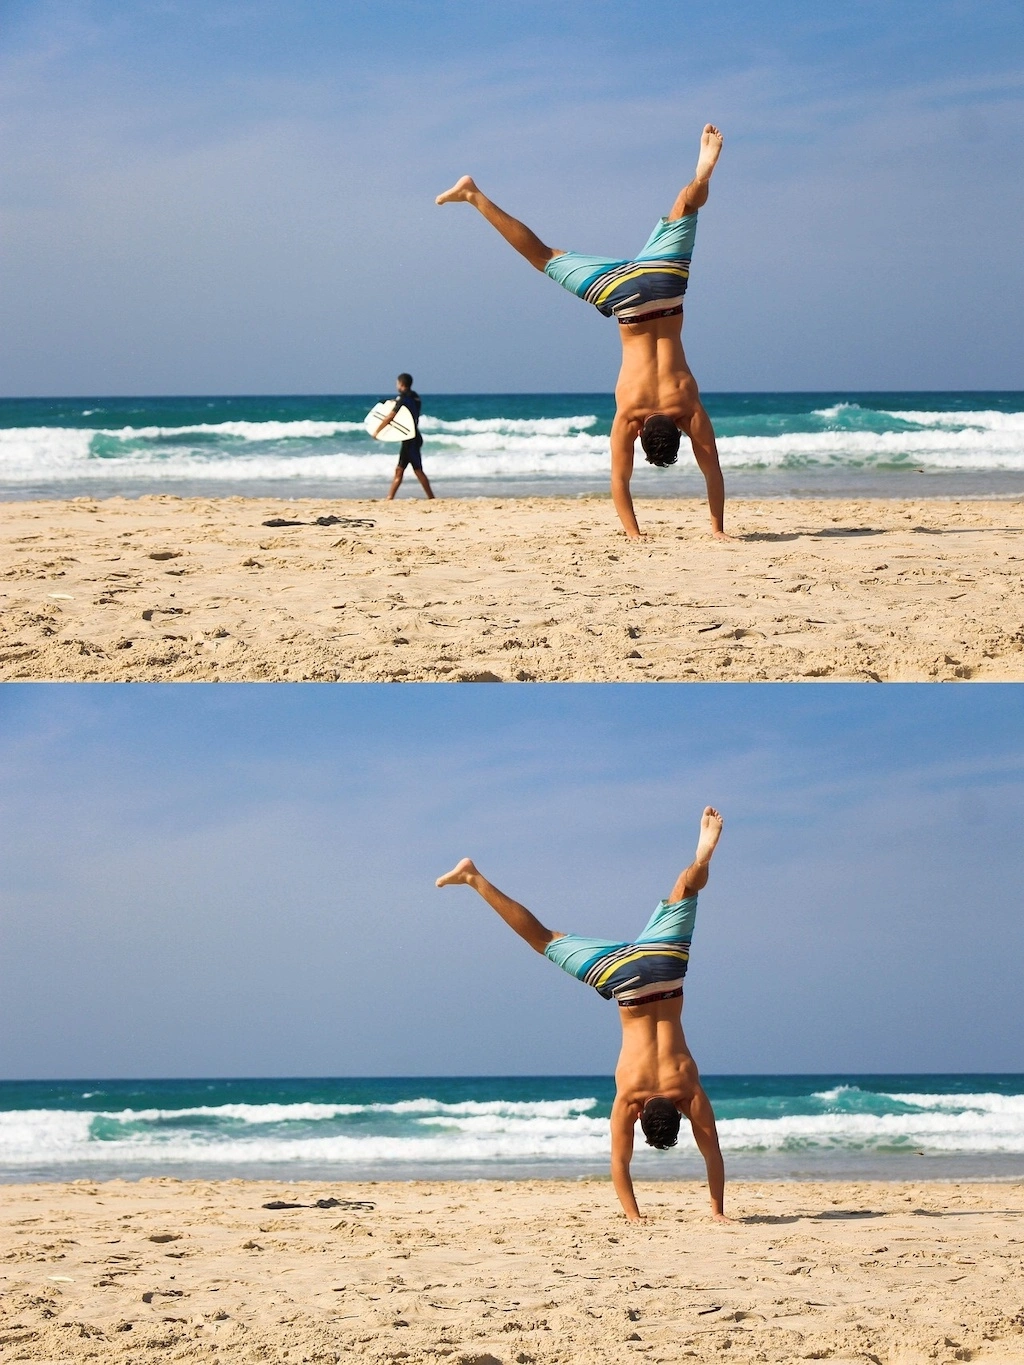
Here are a few illustrative examples that showcase the application of the object removal and inpainting operation in action.
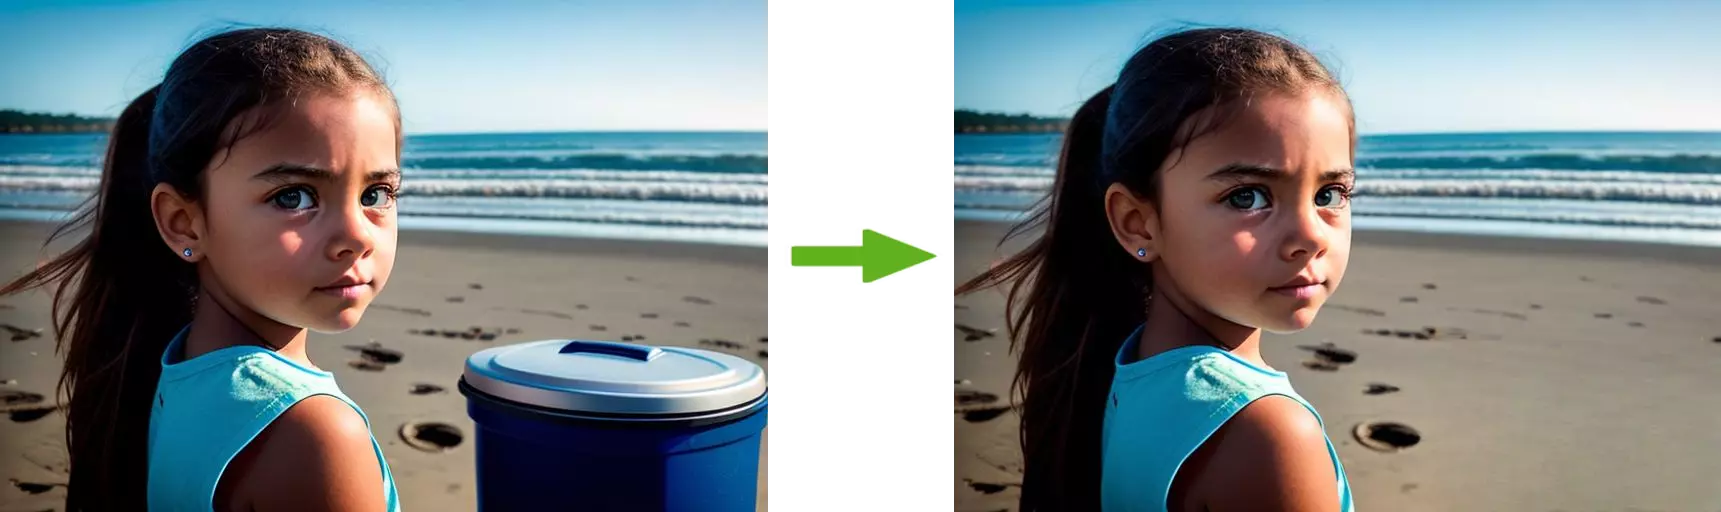
Object removal and inpainting uses the same selection tools as object cutout for selecting object or regions to remove or inpaint into. The figure below shows a screenshot of object removal in action.

The result after "object removal" is shown below:
Upscale and Enhance
improves the image resolution by a factor of two on each dimension, powered by AI super-resolution.
enhances face's clarity and removes artifacts.
does both in one operation.
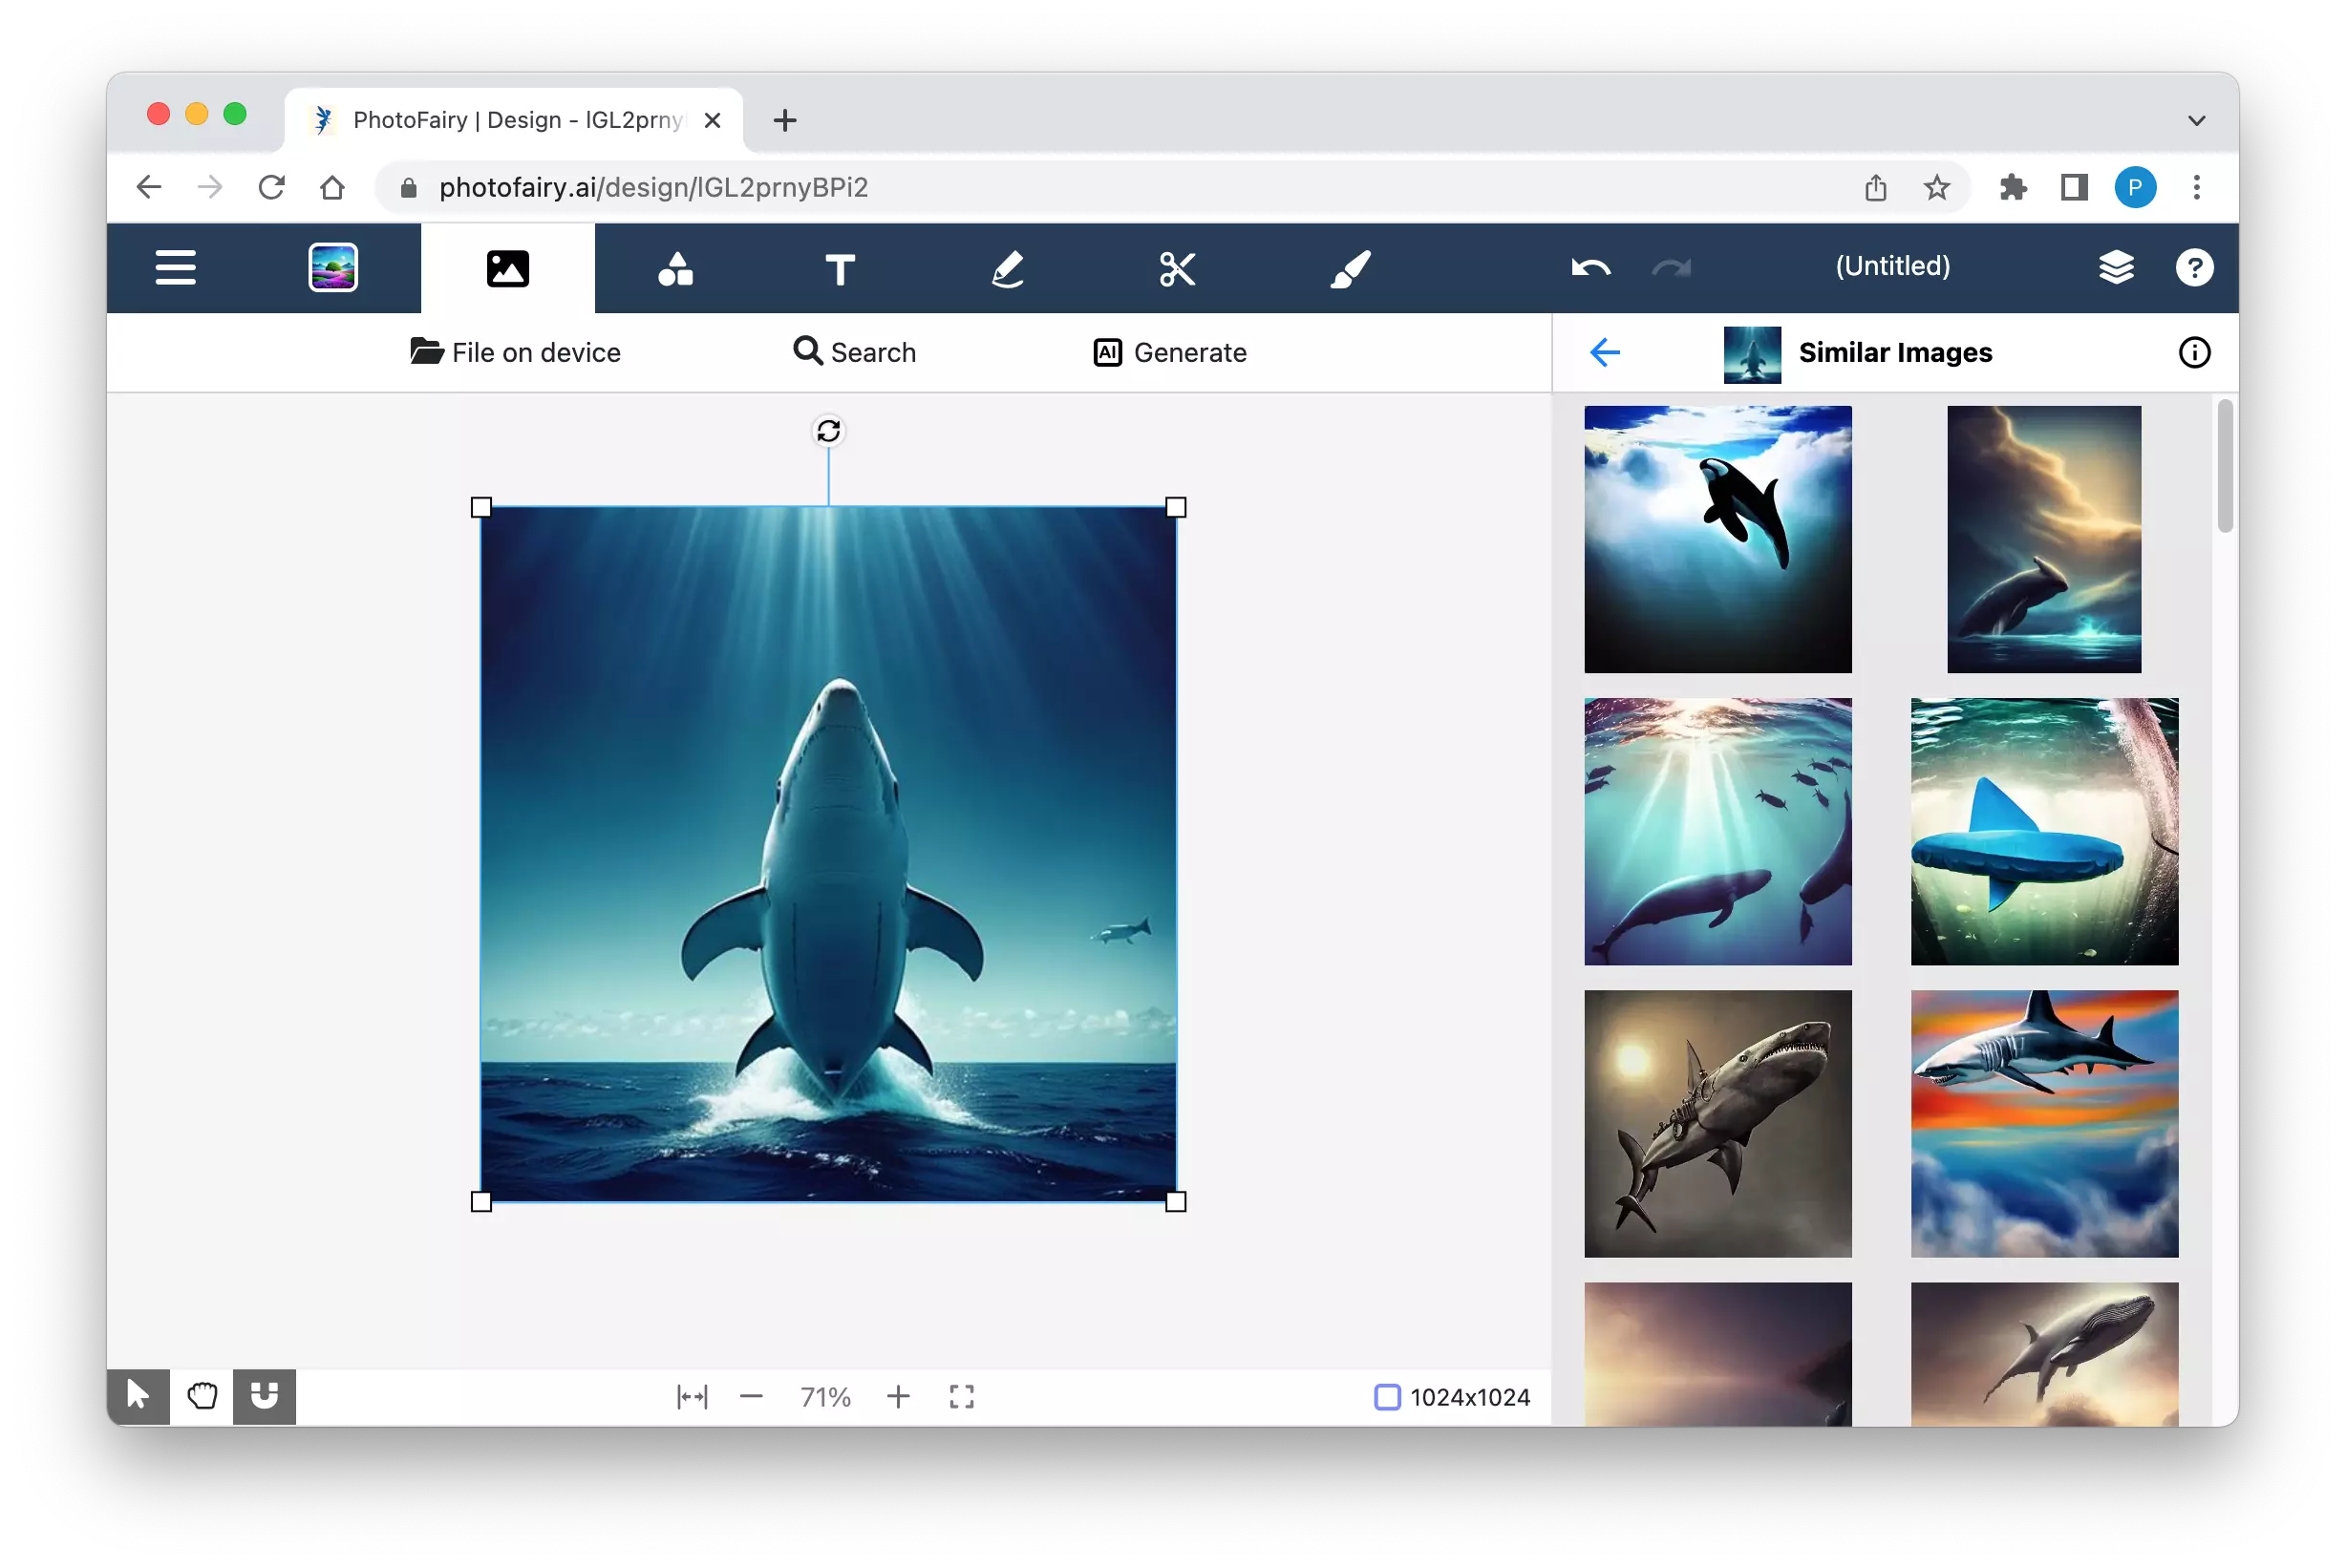
Find Similar Images
This action helps you find images of similar visual contents. The images in this repository have been generated by AI, powered by Lexica Art.
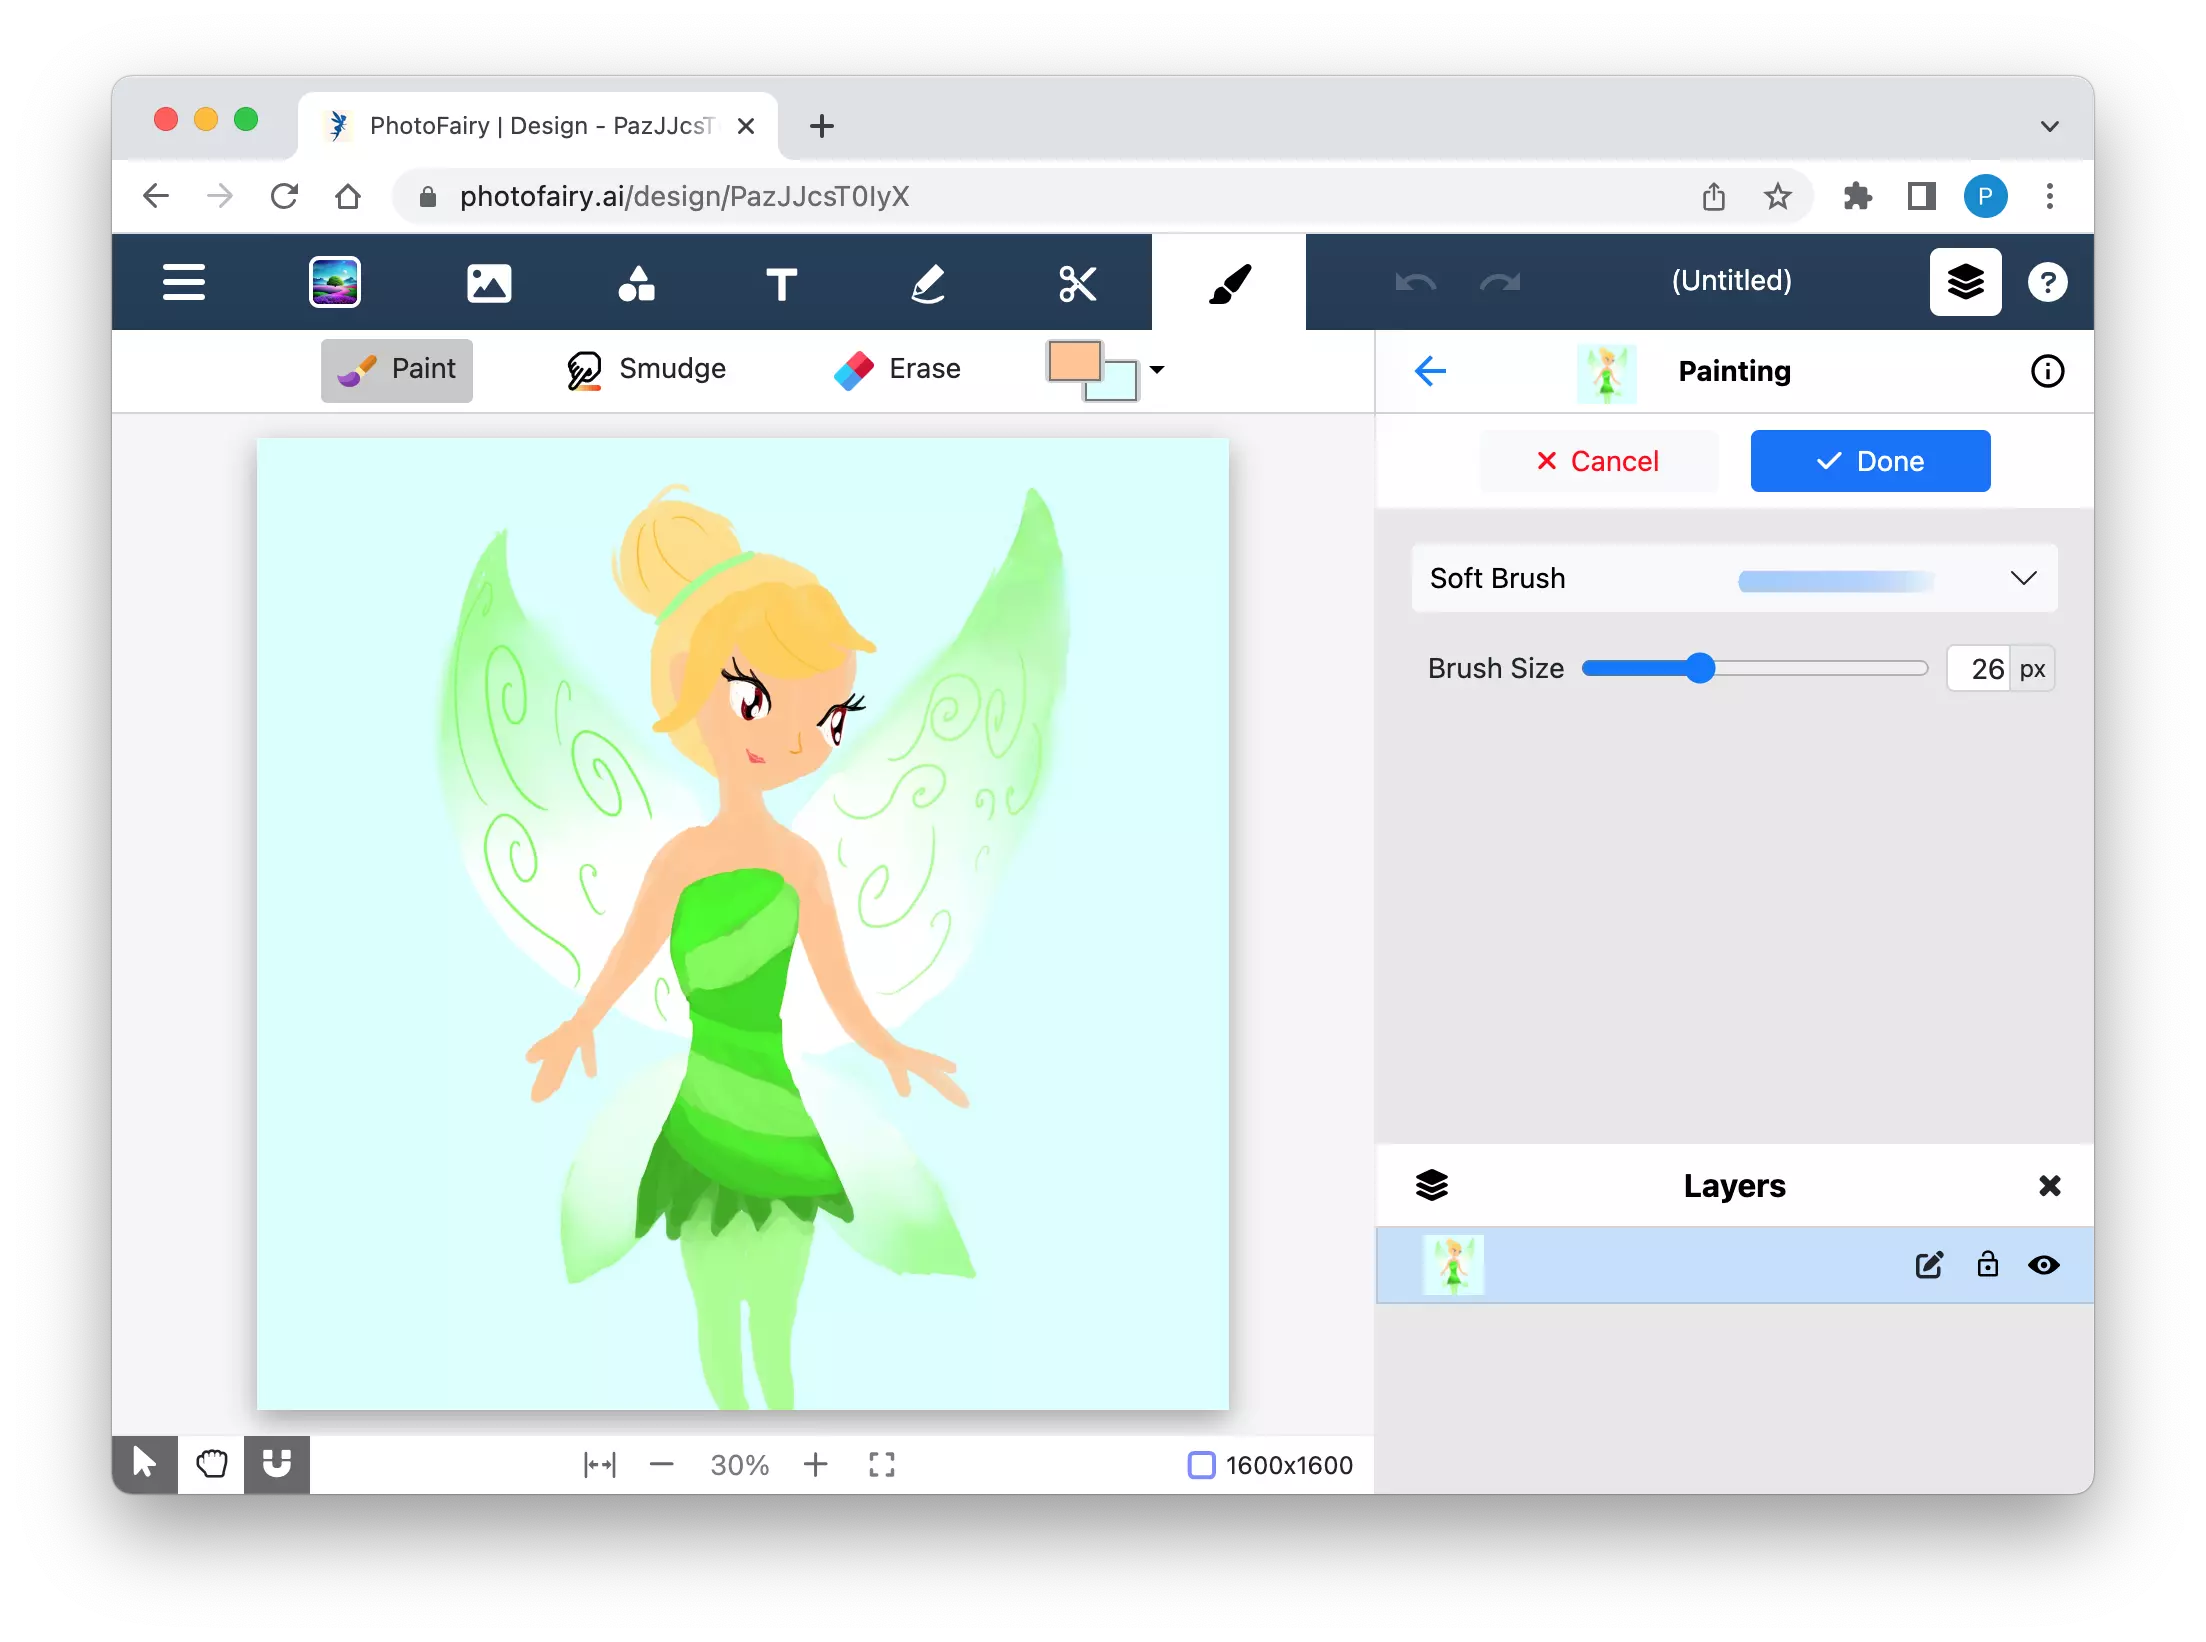
Painting
PhotoFairy provides a versatile and user-friendly painting functionality that empowers you to unleash your creativity with a wide range of essential painting functionalities. Seamlessly perform paint, erase, and smudge operations to bring your artistic visions to life. You can choose from a diverse selection of brush styles, including the precise hard brush, the smooth and gentle soft brush, the graceful calligraphy brush, the expressive fountain pen, and the textured bristle brush. Adjust the brush size to achieve the desired level of detail and precision.
But that's not all – PhotoFairy's painting functionalities go beyond the basics when combined with other tools. The painting functionality and AI-powered functionalities seamlessly complements with each other to offer a versatile and expressive workflow. You can use painting to not only draw a picture from scratch or sketch out your ideas, but also take advantage of our revolutionary "Reimagination" AI tools. Simply create a sketch, and let our advanced algorithms transform it into a breathtaking masterpiece, enhancing and refining your original concept. Additionally, the erasing functionalities provide precise control for fine adjustments to cutout boundaries, ensuring impeccable precision and seamless integration with your compositions.
![]() Painting brushes can also be adjusted by keyboard shortcuts: and .
Painting brushes can also be adjusted by keyboard shortcuts: and .
| |
|
|